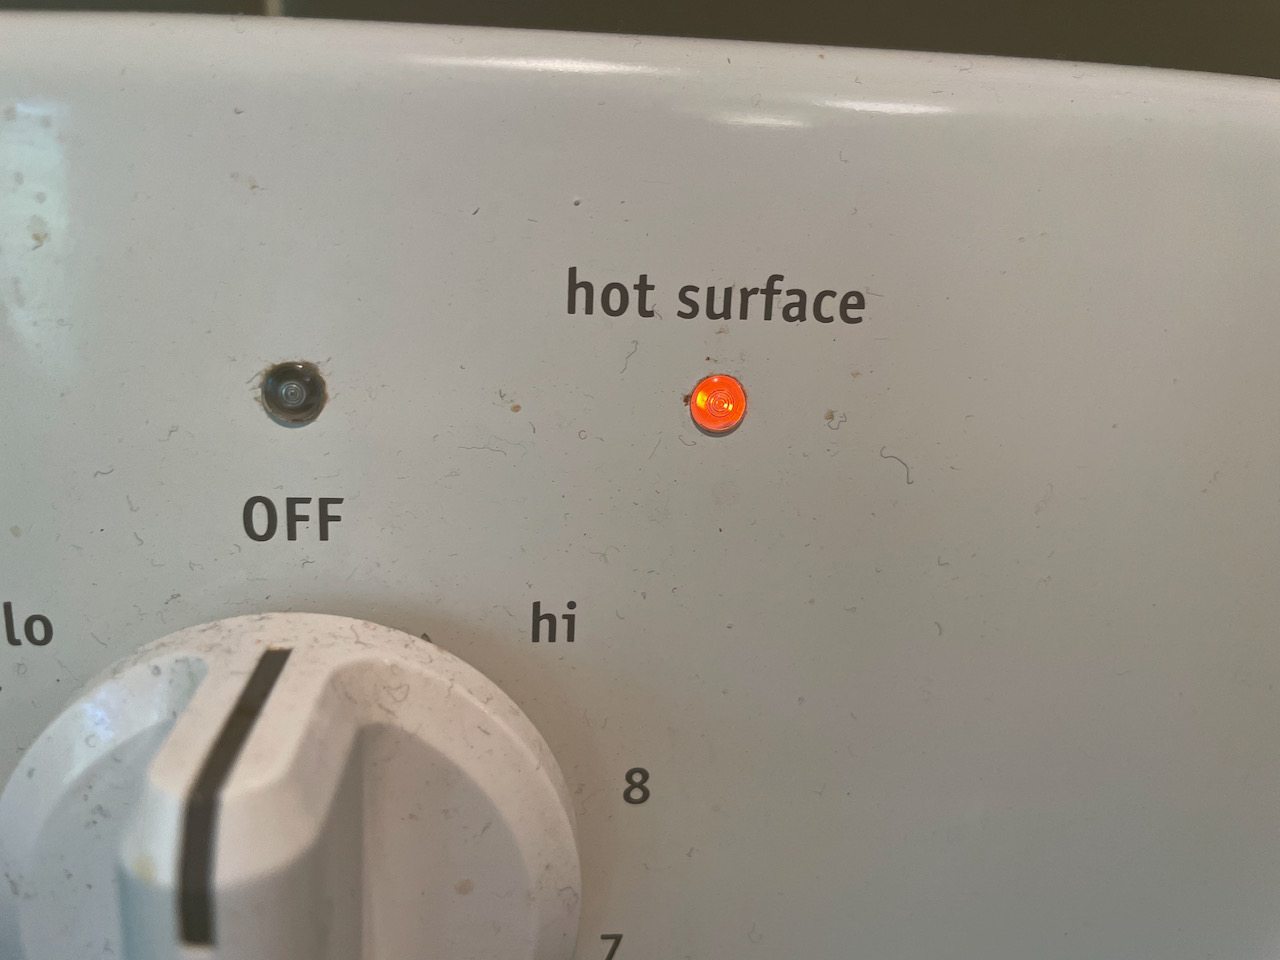
To celebrate the oven’s 10th birthday, the “hot surface” light would come on more often (such as running the oven, but not burner) and stay on up to three hours (!) after the surface has reached room temperature. Each heating element has a thermostat, and this is a symptom of one or more of those going out. Unfortunately, the thermostat is built into the heating element, so the whole thing must be replaced. Fortunately, the four sizes of elements are fairly common and available at fine places like Repair Clinic.
The first step is to determine which of the five burners is/are the problem. Given our use pattern, it’s most likely the front right or front left, as these are the easiest access & best power range. To test, simply set a hot pot on it until the light comes on then observe how long it takes to turn off. It will be pretty obvious because it takes a long time. Mine was the biggest, most expensive replacement, of course.
Replacing the element is not difficult, but it’s messy and you are advised to take photos. You will need:
- A Phillips-head screwdriver.
- A small piece of wood, approximately 18″ long. This is used to prop the top up while you work.
- Pair of pliers to grip the connectors.
- Gloves – beneath the burners is a layer of fiberglass insulation. You don’t want to get that on your skin.
- Cleaning supplies. After ten years’ use, there is a lot of gook around the edges of the oven that you should clean off.
- Quesadilla supplies (tortillas, salsa, cheese) and a beer to enjoy later.
First and foremost, turn off the 220-volt circuit breaker in your garage labeled “Oven.” The clock will beep angrily as its power goes out.
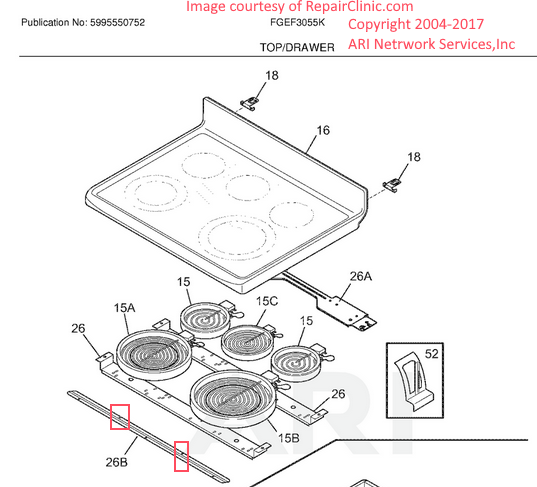
To open the top, open the door and remove the two screws just off-center. In the diagram below, these have red rectangles around them. Do not remove the other screws. (If you do, the metal piece “26B” will fall out as soon as you pop the top up. It is awkward to get back into position. Don’t ask me how I know there are more holes than screws.)
Next, pull the top piece towards you slightly to loosen. (In theory, the clips in #18 can pop out; in practice, these were loose enough that I could just open it anyway.) Once loosened, lift the front up and put the piece of wood in to prop it up. This would be a good time to clean the nasty around the perimeter.
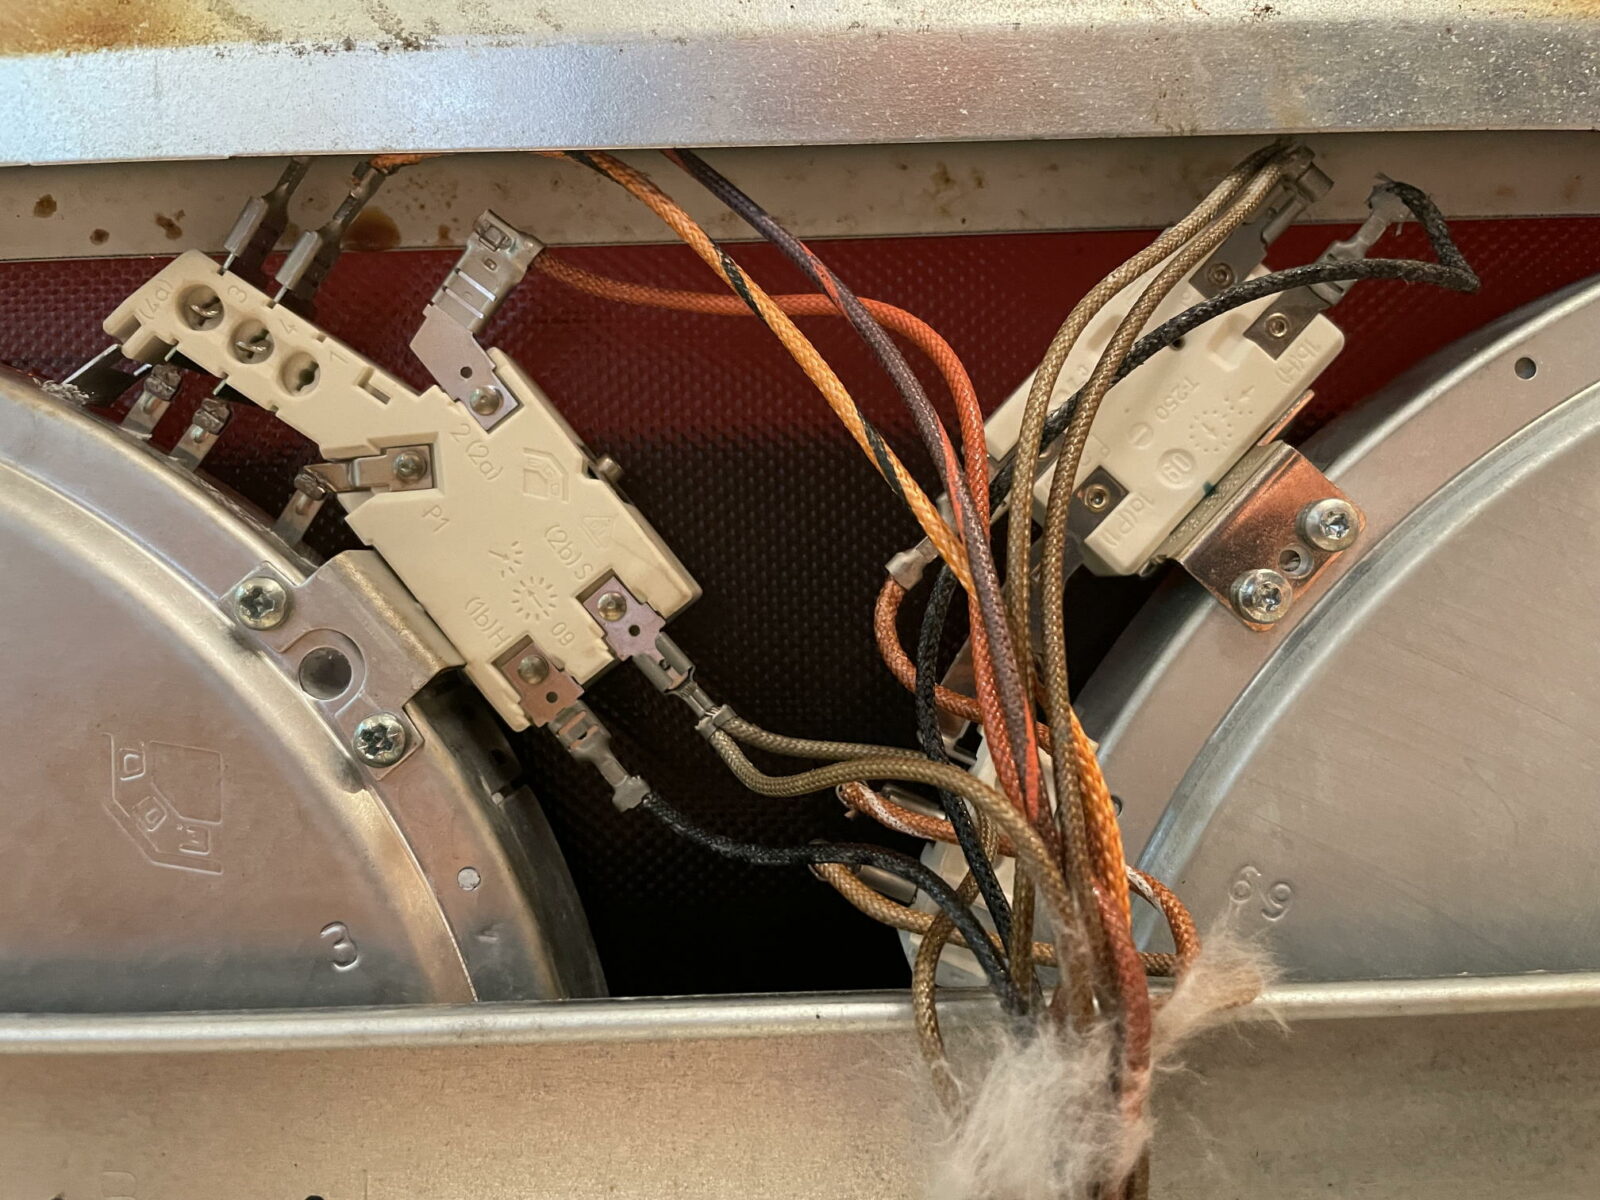
Take a photo of the wires on the electrical connections. On the element I was replacing, the high and low power were both orange. Yay!
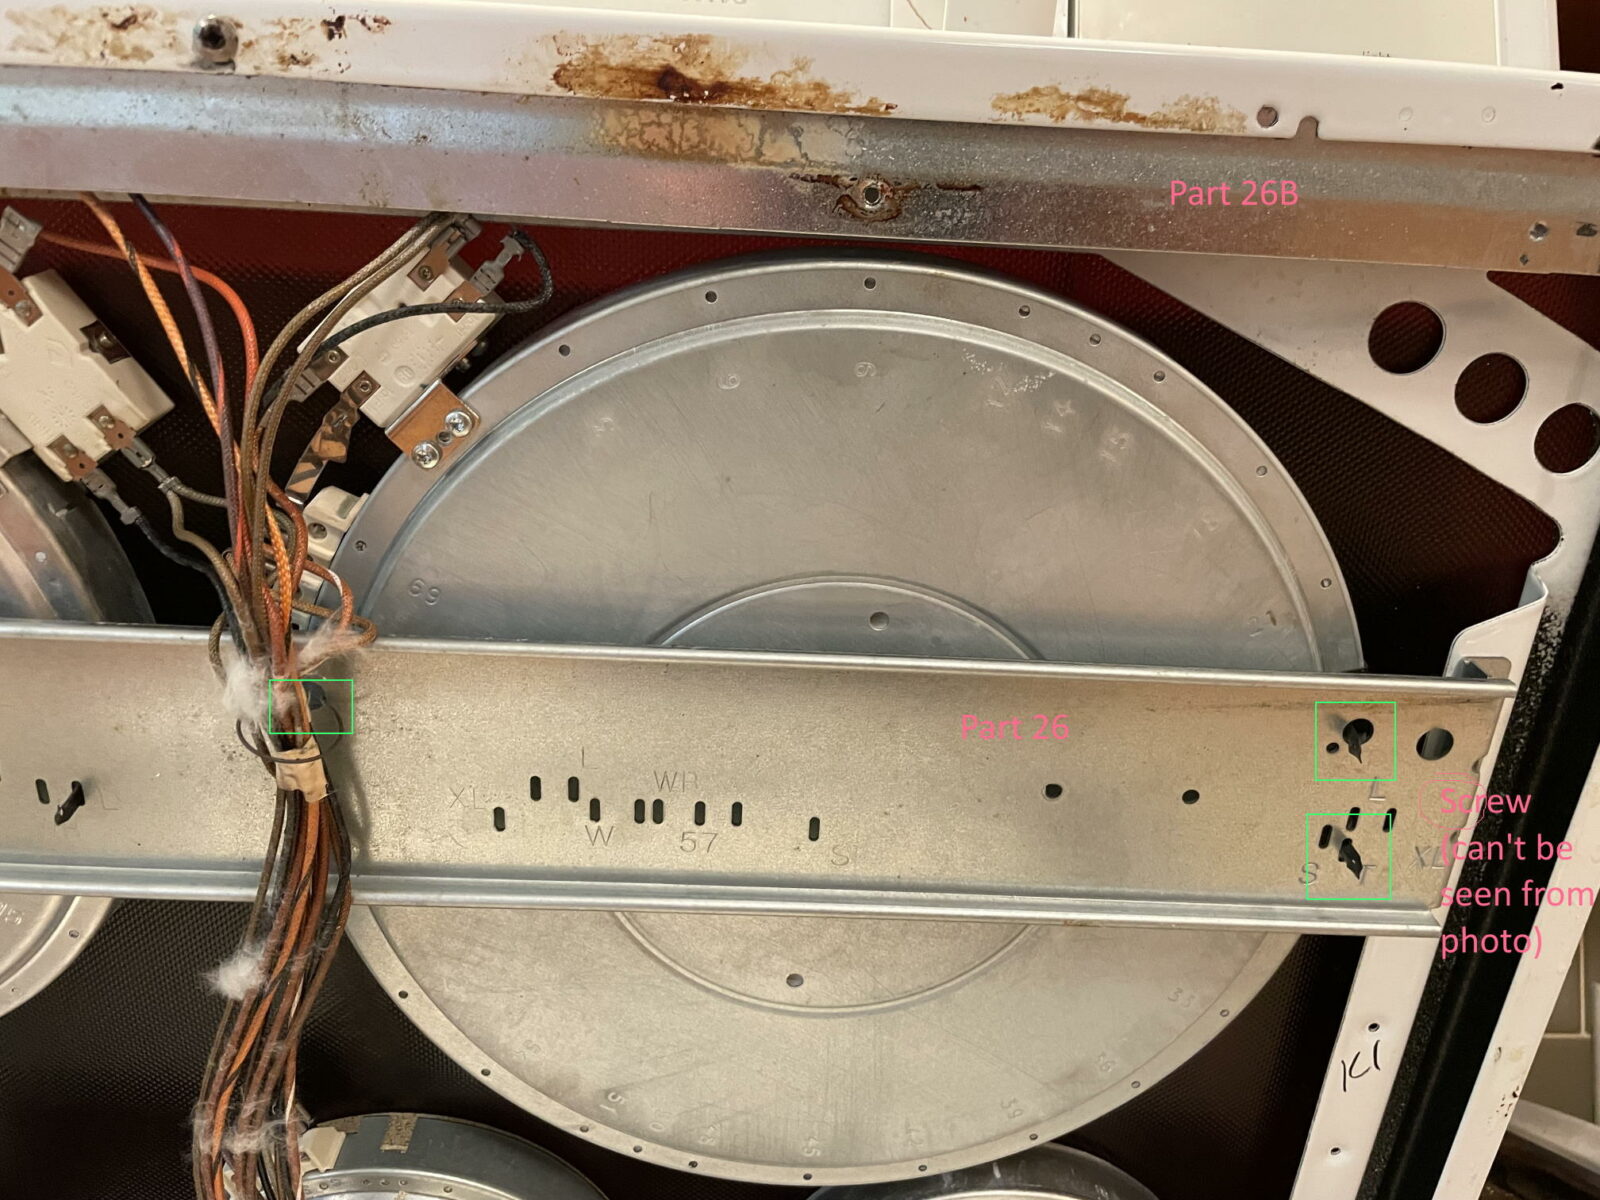
Now, loosen the screws on each end of the crossbar (this is part 26 on the diagram above) holding the elements flush against the surface. In the photo below, I’ve drawn on part numbers for 26B, 26 (crossbar). The two screws are just on the end of each side. Gently lower the burner assembly down onto the insulation, and rotate it slightly so you can release the three clips (green rectangles) to remove the element.
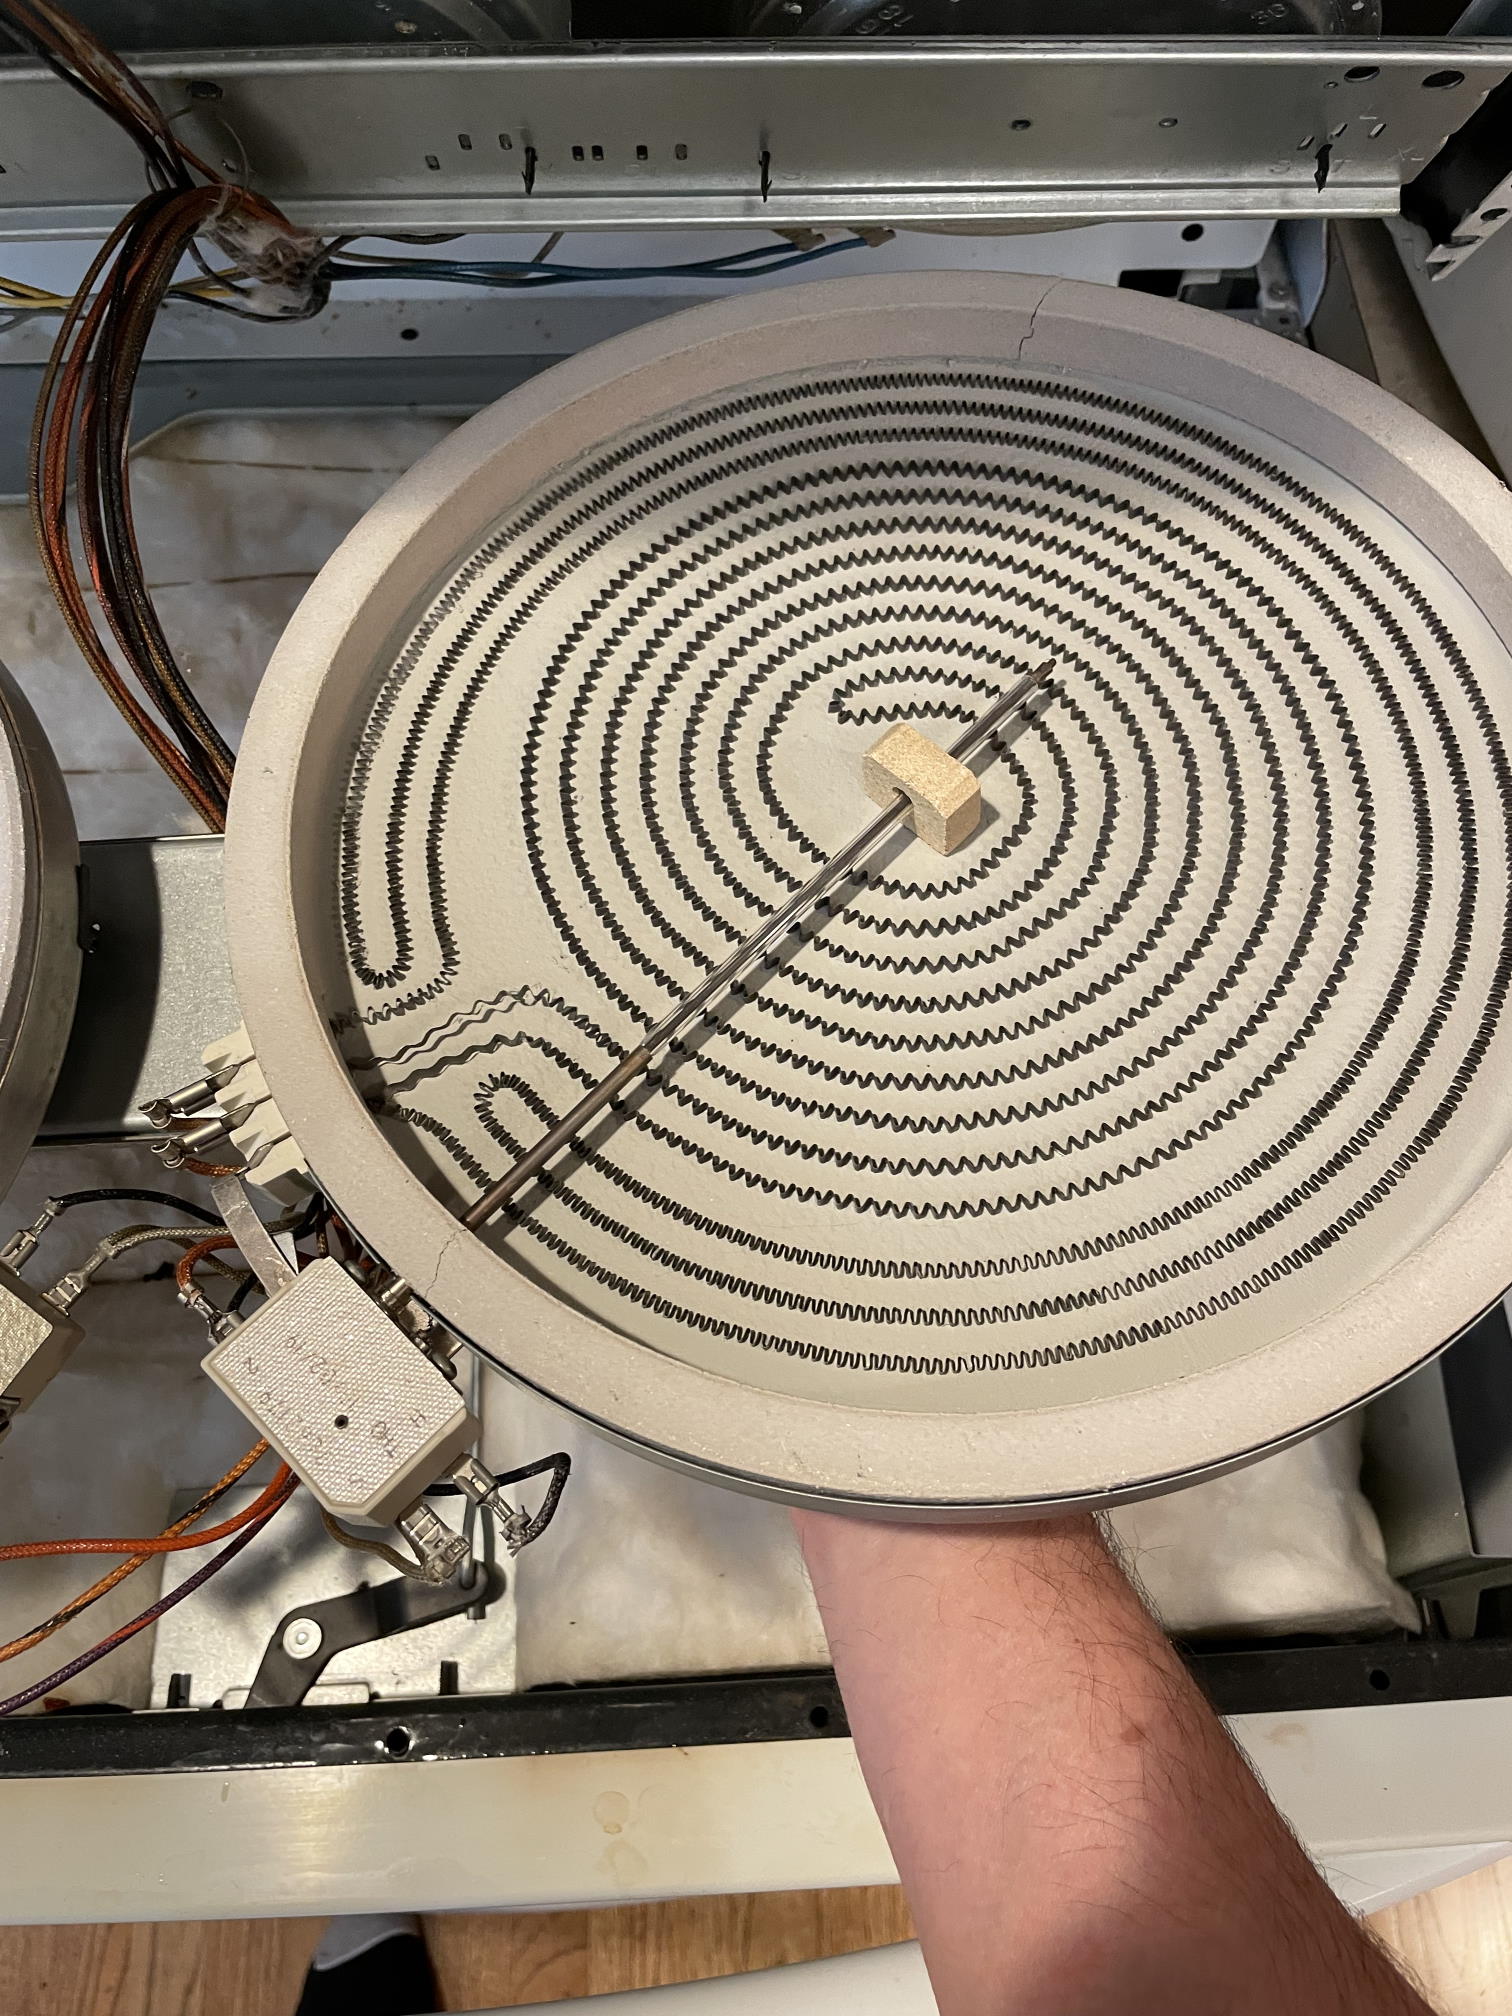
If all was successful, you can flip the burner over. Take a few more photos of the wiring just in case. In the photo below is the old burner. The ceramic is cracked around the edges. The heating components are the squiggly wires forming two circuits. The long tube is the thermostat unit. Theoretically, you should be able to attach a voltmeter to it and look for an short circuit. This didn’t work for me, which is why I did the thermodynamic test above.
Now, after taking one more photo of the connectors…
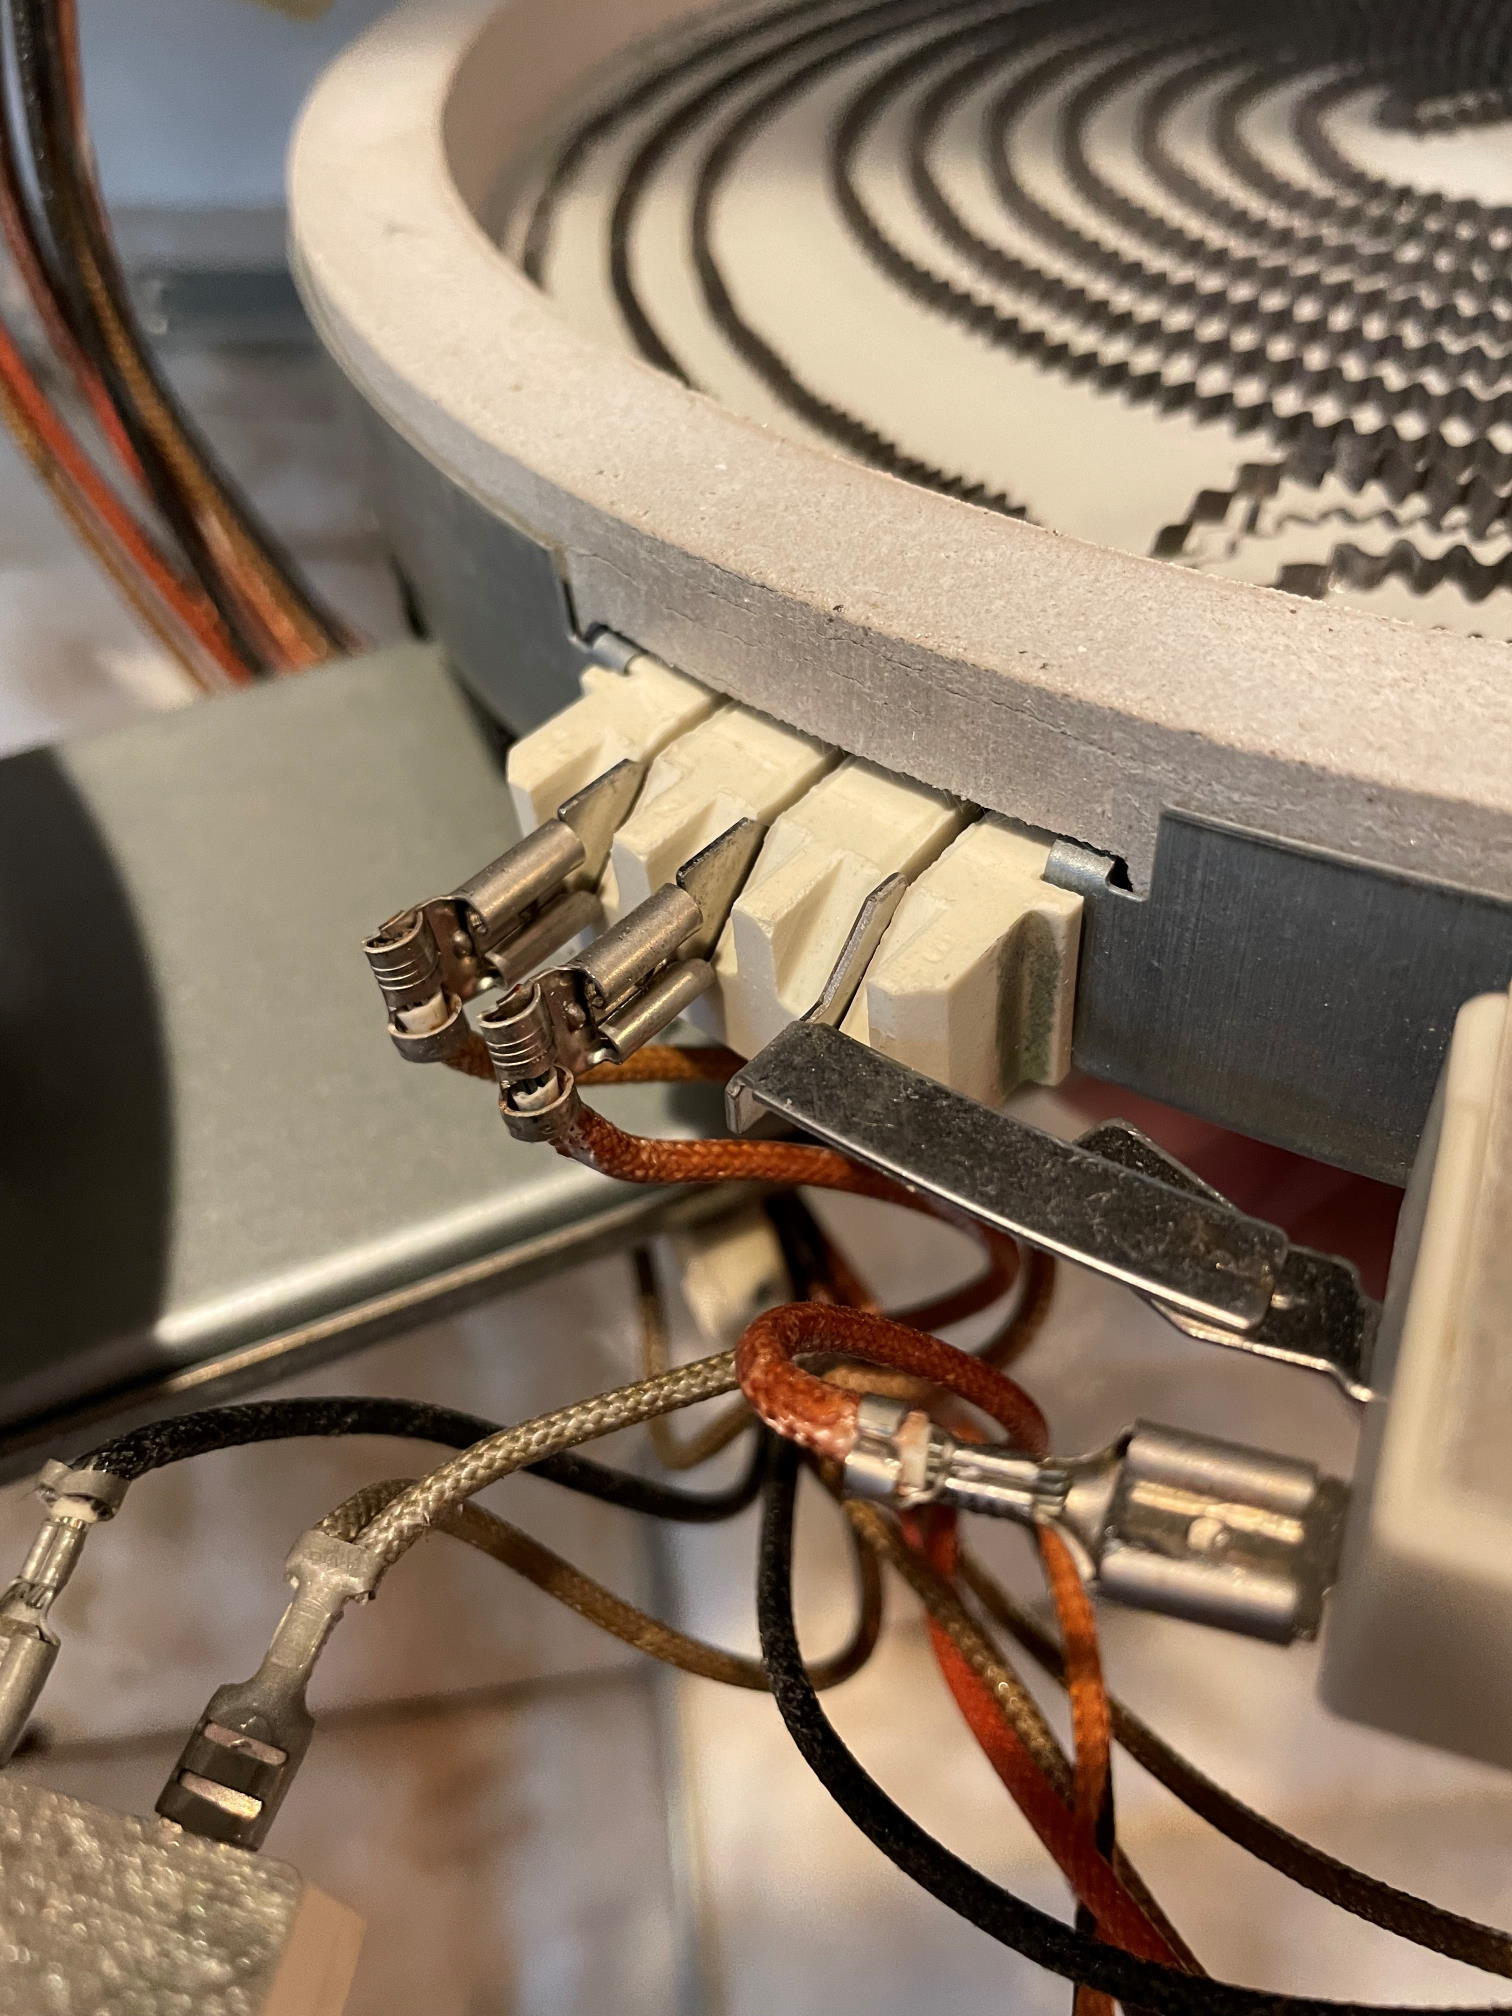
Grip them with a pair of pliers and remove them. On the dual-heating elements, there should be five: three for the heating, two for the thermostat.
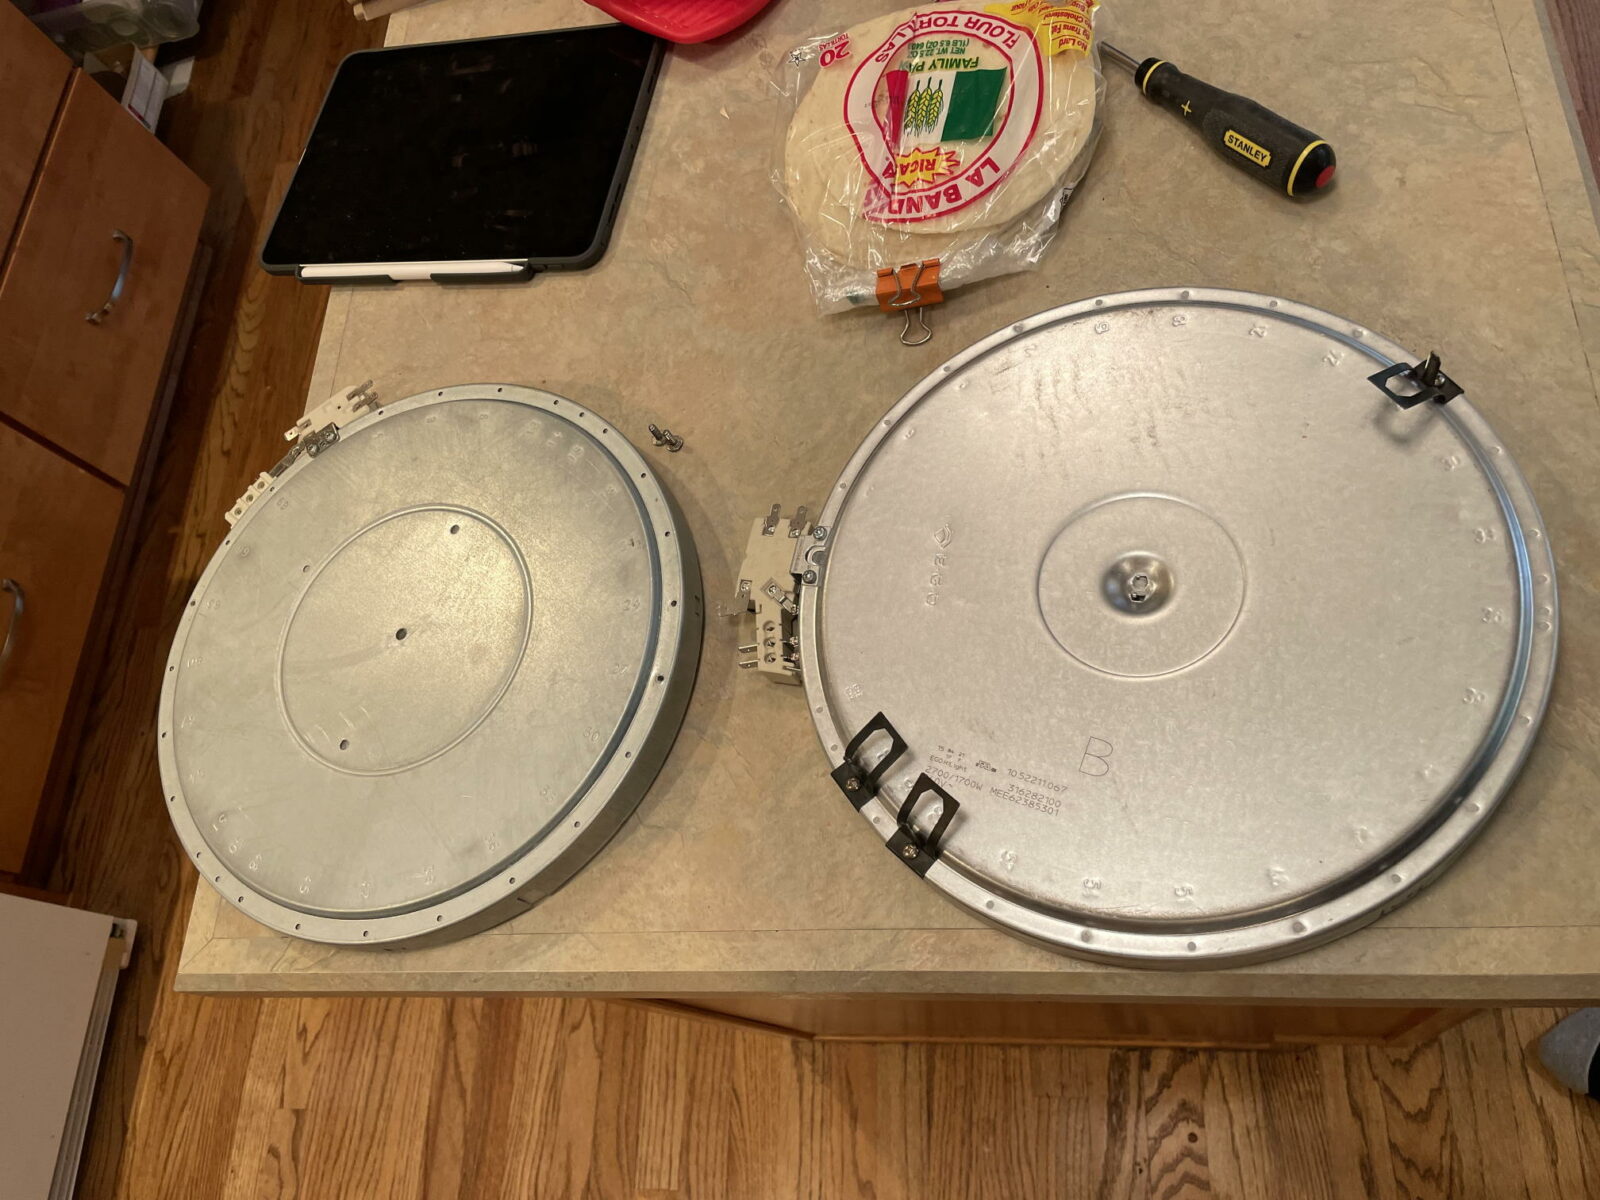
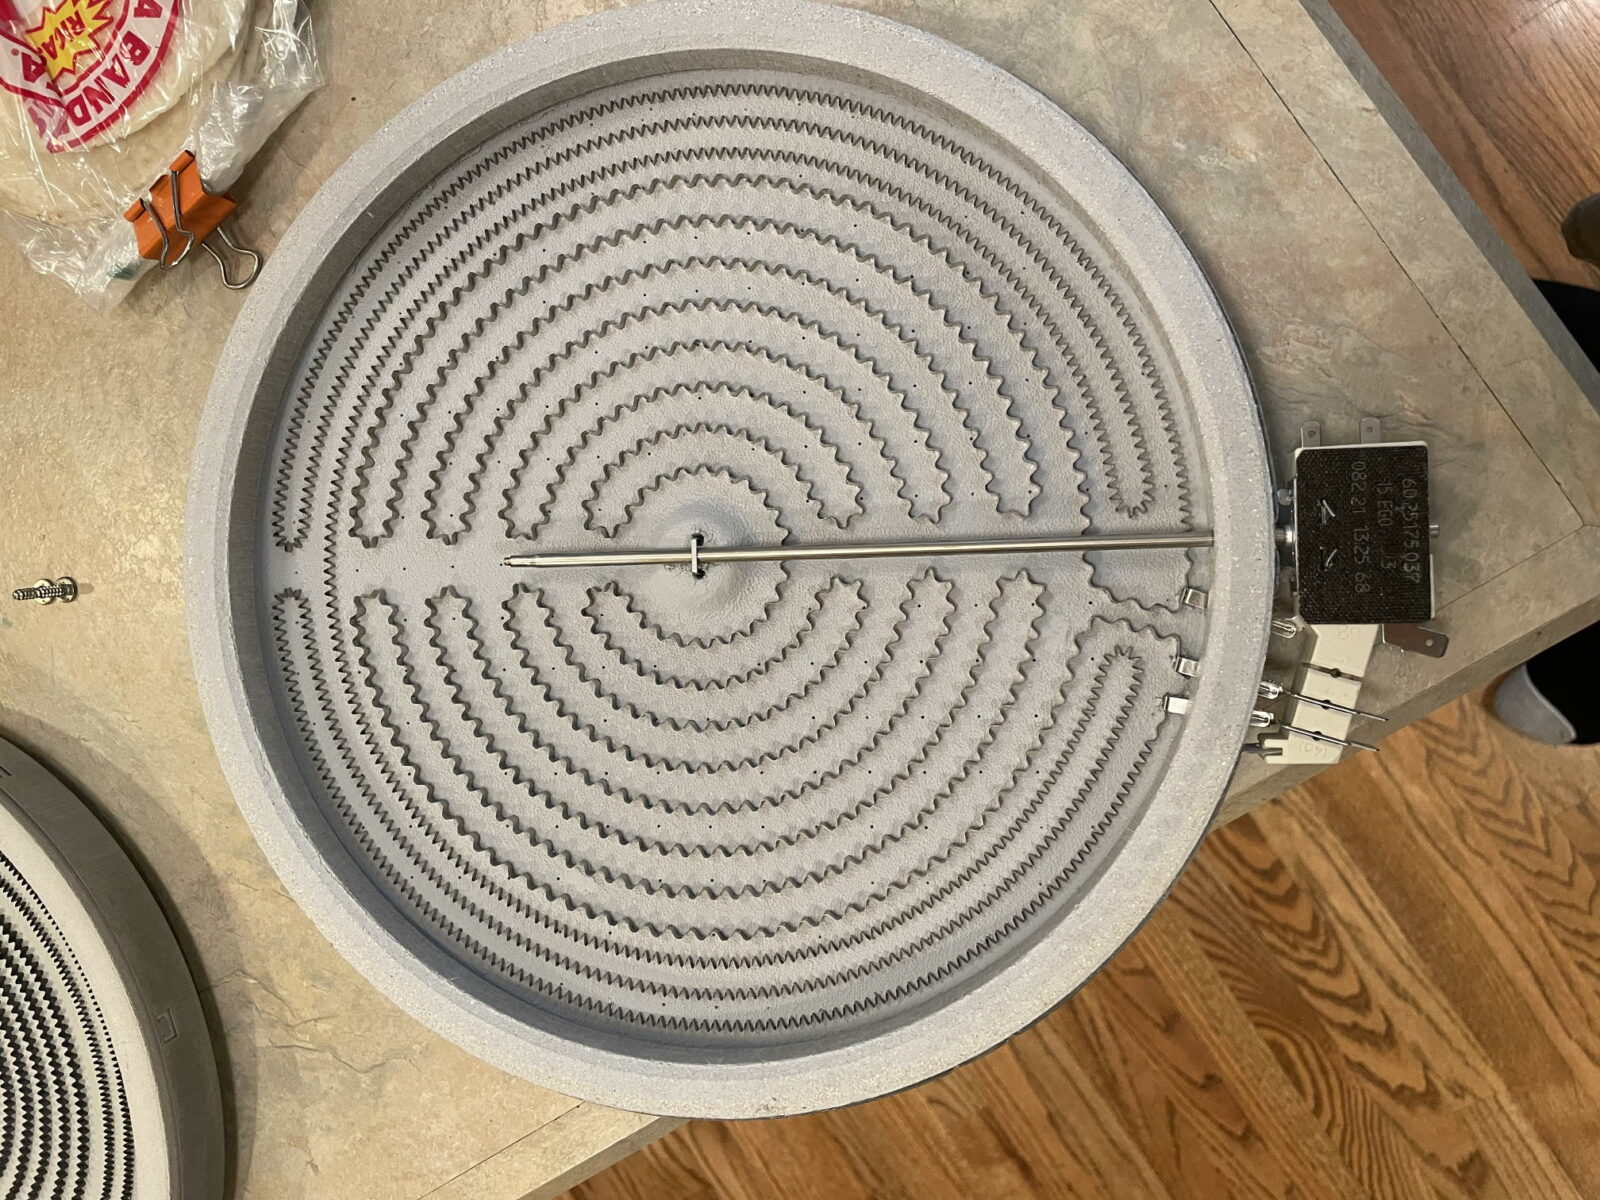
Place the new and old burners face-down on a smooth surface. Around the perimeter you will see little numbers. Remove a clip from the old burner, place it in the corresponding number on the new burner. Repeat for the remaining clips. It is important that you have them on the same positions so the new burner slides right into place.
Assemble in reverse order.
That reverse order:
- Connect the wires to the same positions.
- Place the element clips in the little slots on the crossbar.
- Lift the crossbar up and put both screws in.
- Remove the wood and gently lower the top.
- Put the two screws back in to secure the top.
- Turn on the breaker.
- Test: turn your burner on its lowest setting. The center element should light up. (If, instead, the outer element lights but the center is out, you have reversed the high and low-power wires and will have to open it back up and swap them. You can do this without removing the element.)
Using the tortillas on the counter, make quesadillas and enjoy a beer, you’re done!