My first HF radio, the Elecraft KX3, was air-cooled and got me spoiled to the relatively quiet operation. The K4D, on the other hand, has two fans. Although the “base” ventilation speed has been lowered, there’s also some whining from the bearings. Most hams can’t hear it, I, unfortunately, can and don’t enjoy the sound.
I’d previously replaced the ones in my VHF/UHF radios, and reasoned there would be a similar process, but I’d been holding off until (a) the warranty expired, (b) I could find a fan that would fit and (c) someone else did it first, because I don’t want to the guy who finds the way to mess this up!
Several folks have sleuthed out how to get quieter fans in and the steps necessary to work:
- Miguel KC1LKO
- David K5DJO
- Wayne N6KR
- Andrew NV1B
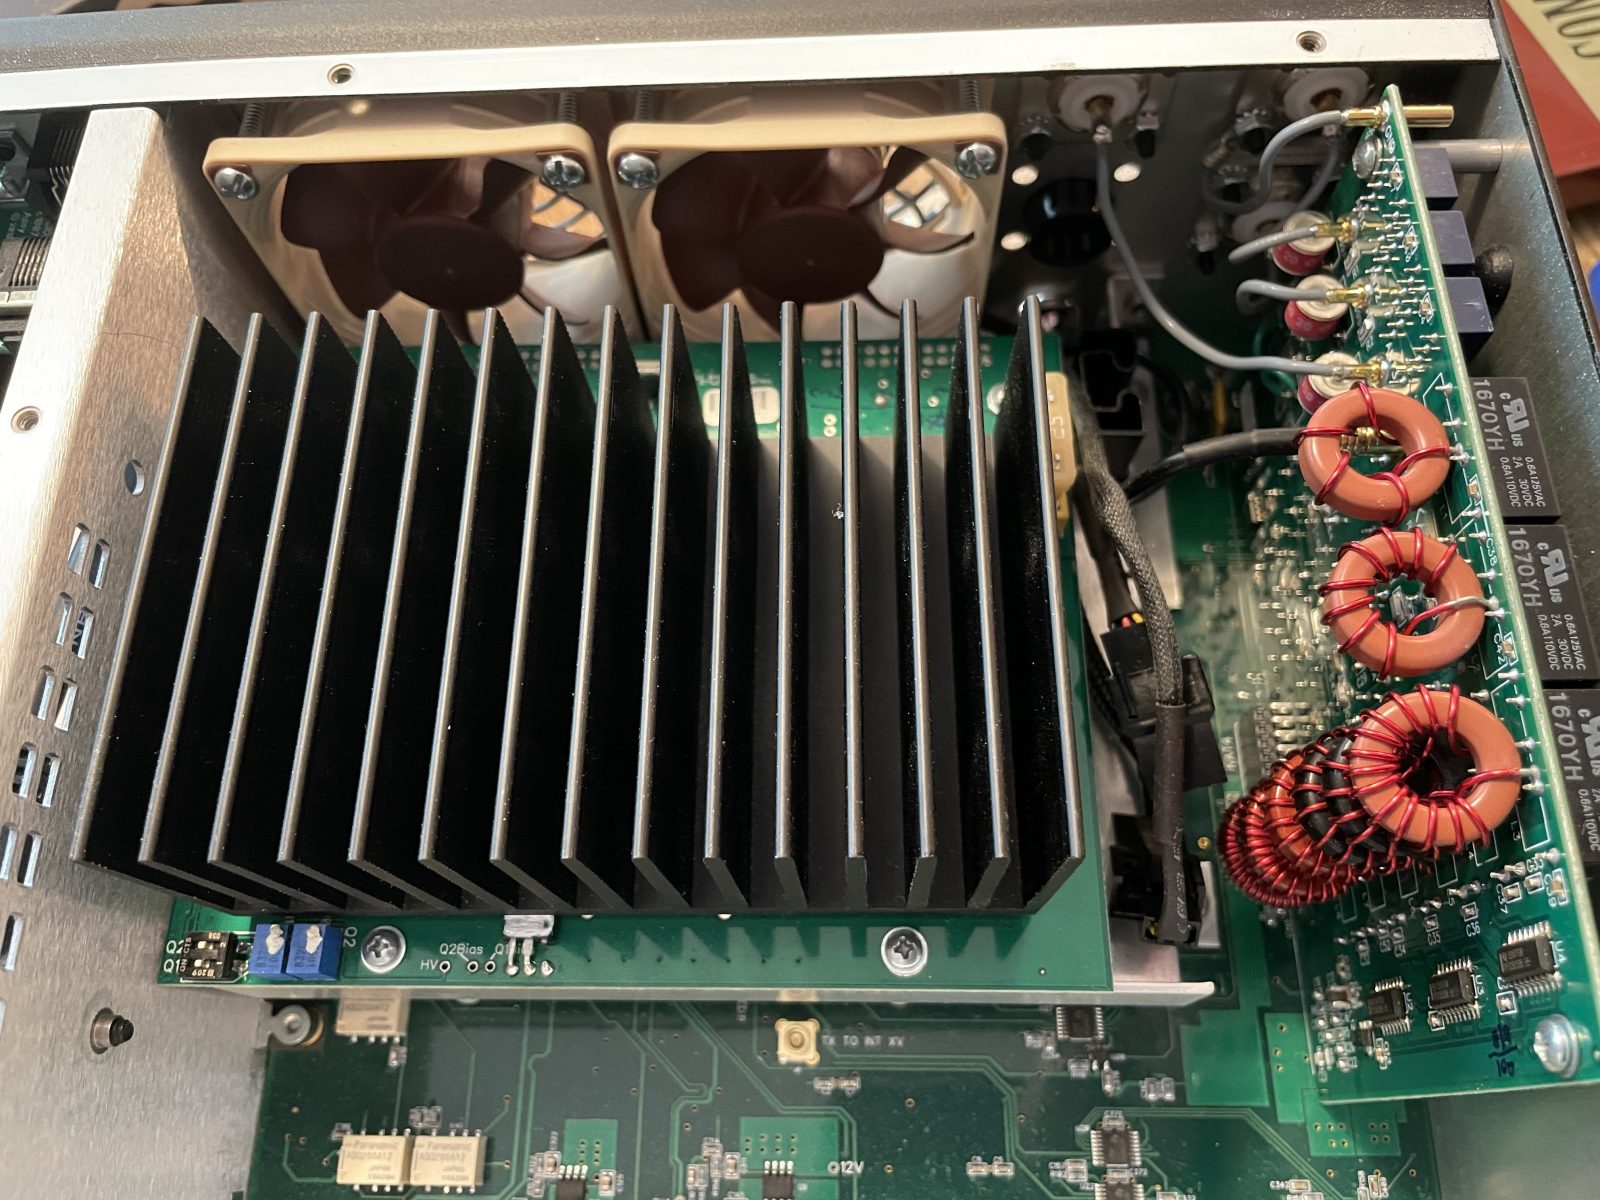
The stock fans run up to 3200 rpm, and provide 15.2 cfm of air movement at 25 db(A). Notably, they’re 60mm square by 15mm deep. The closest match Noctua fans are 60mm square by 25mm deep, run up to 3000 RPM, and provide 17.2 cfm of air movement at 19.3 db(A). So a little bit quieter but much thicker. There is enough clearance inside the radio to make this work.
I did the modification today and it’s easy-peasy. You’ll need a Philips screwdriver with a good tip and these parts:
- (2) Noct5ua NF-A6x25 FLX fans – about $15 each
- (1) pair of 3 or 4-pin to 2-pin adapters – $10 for the pack of 2. If you’re unable to find these somewhere, David (K5DJO) made his own connectors with 2 Molex (22-01-3027) plugs and 4 Molex (08-55-0102) contacts.
- (8) #6-32 1 1/4 inch stainless steel round machine head screws
- (8) #6-32 cap nuts or general nuts
Unplug everything. Then remove the ten screws screws on top (8 in an “I” pattern — three in the front, three in the back, two down the center separator) and one on each side. The top cover should lift out. Unplug the speaker wire (green box below) so the cover can be moved somewhere else.
Facing the front of the radio, remove the screws from the KPA4 (it’s the thing with large fins on it). Gently lift it up to unplug.
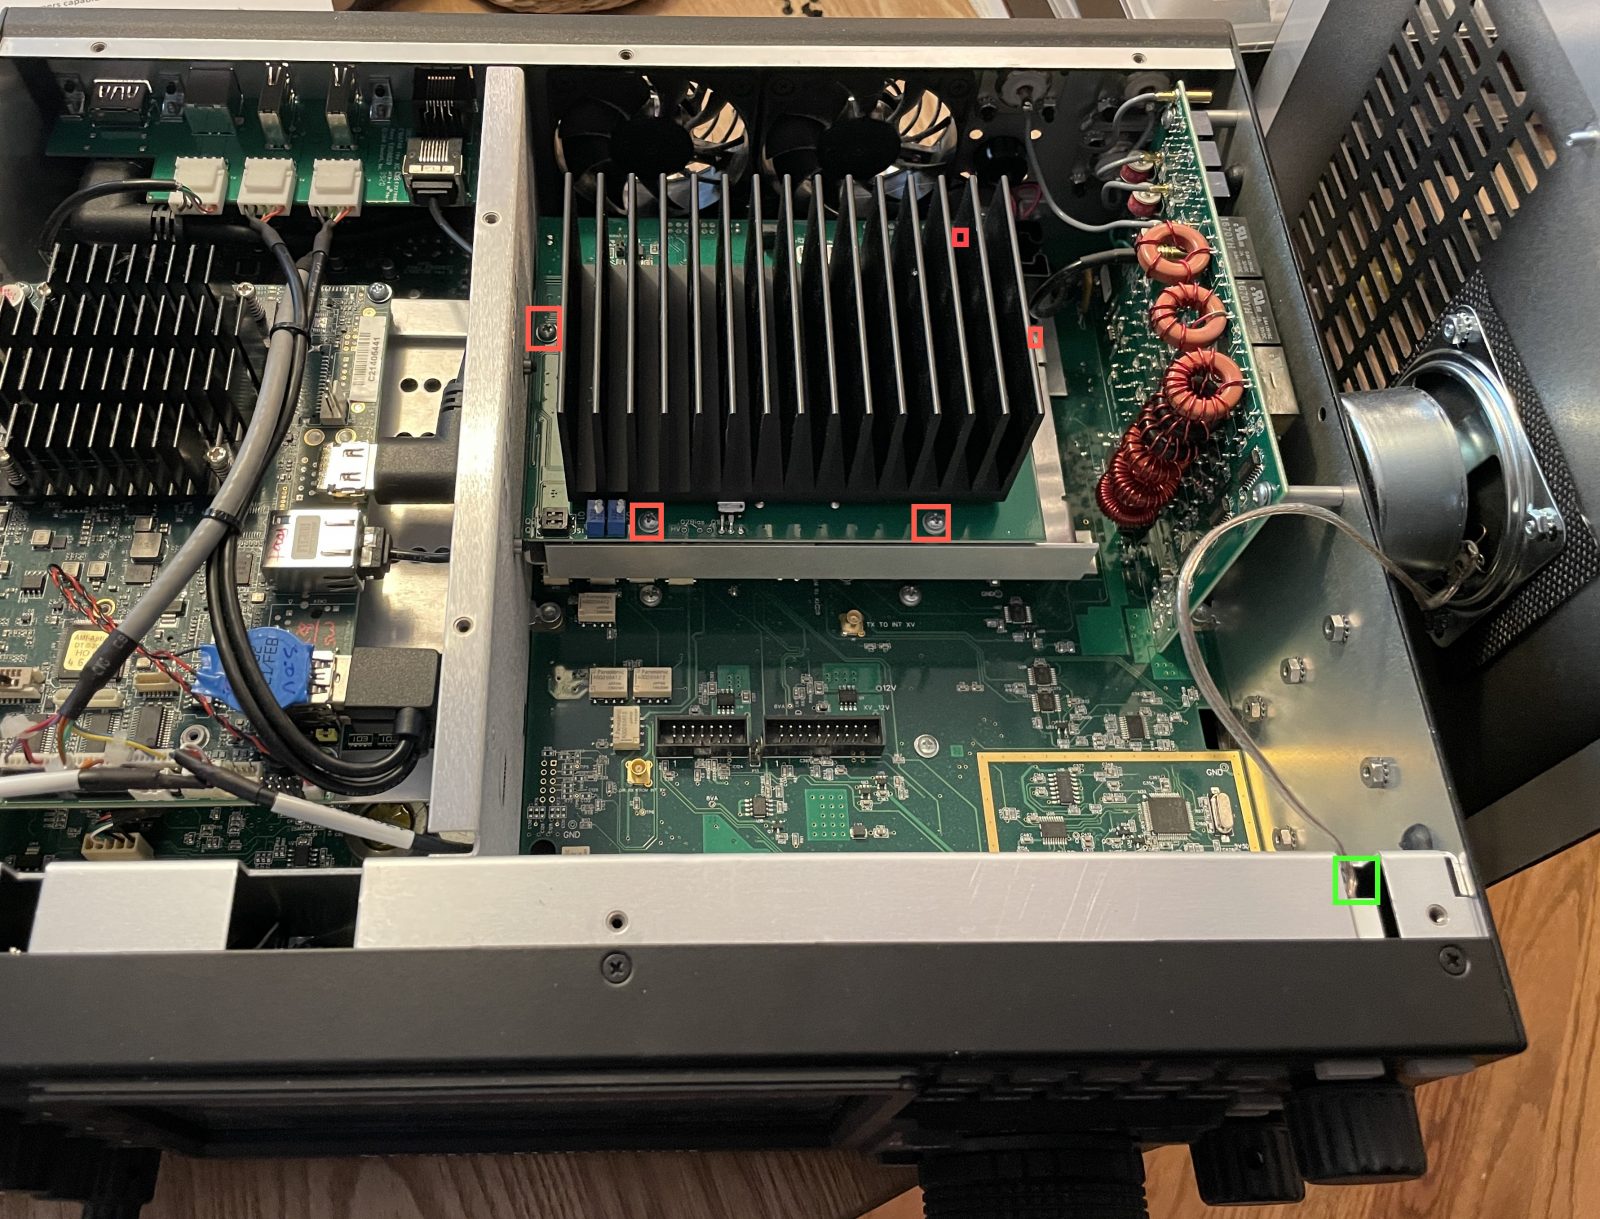
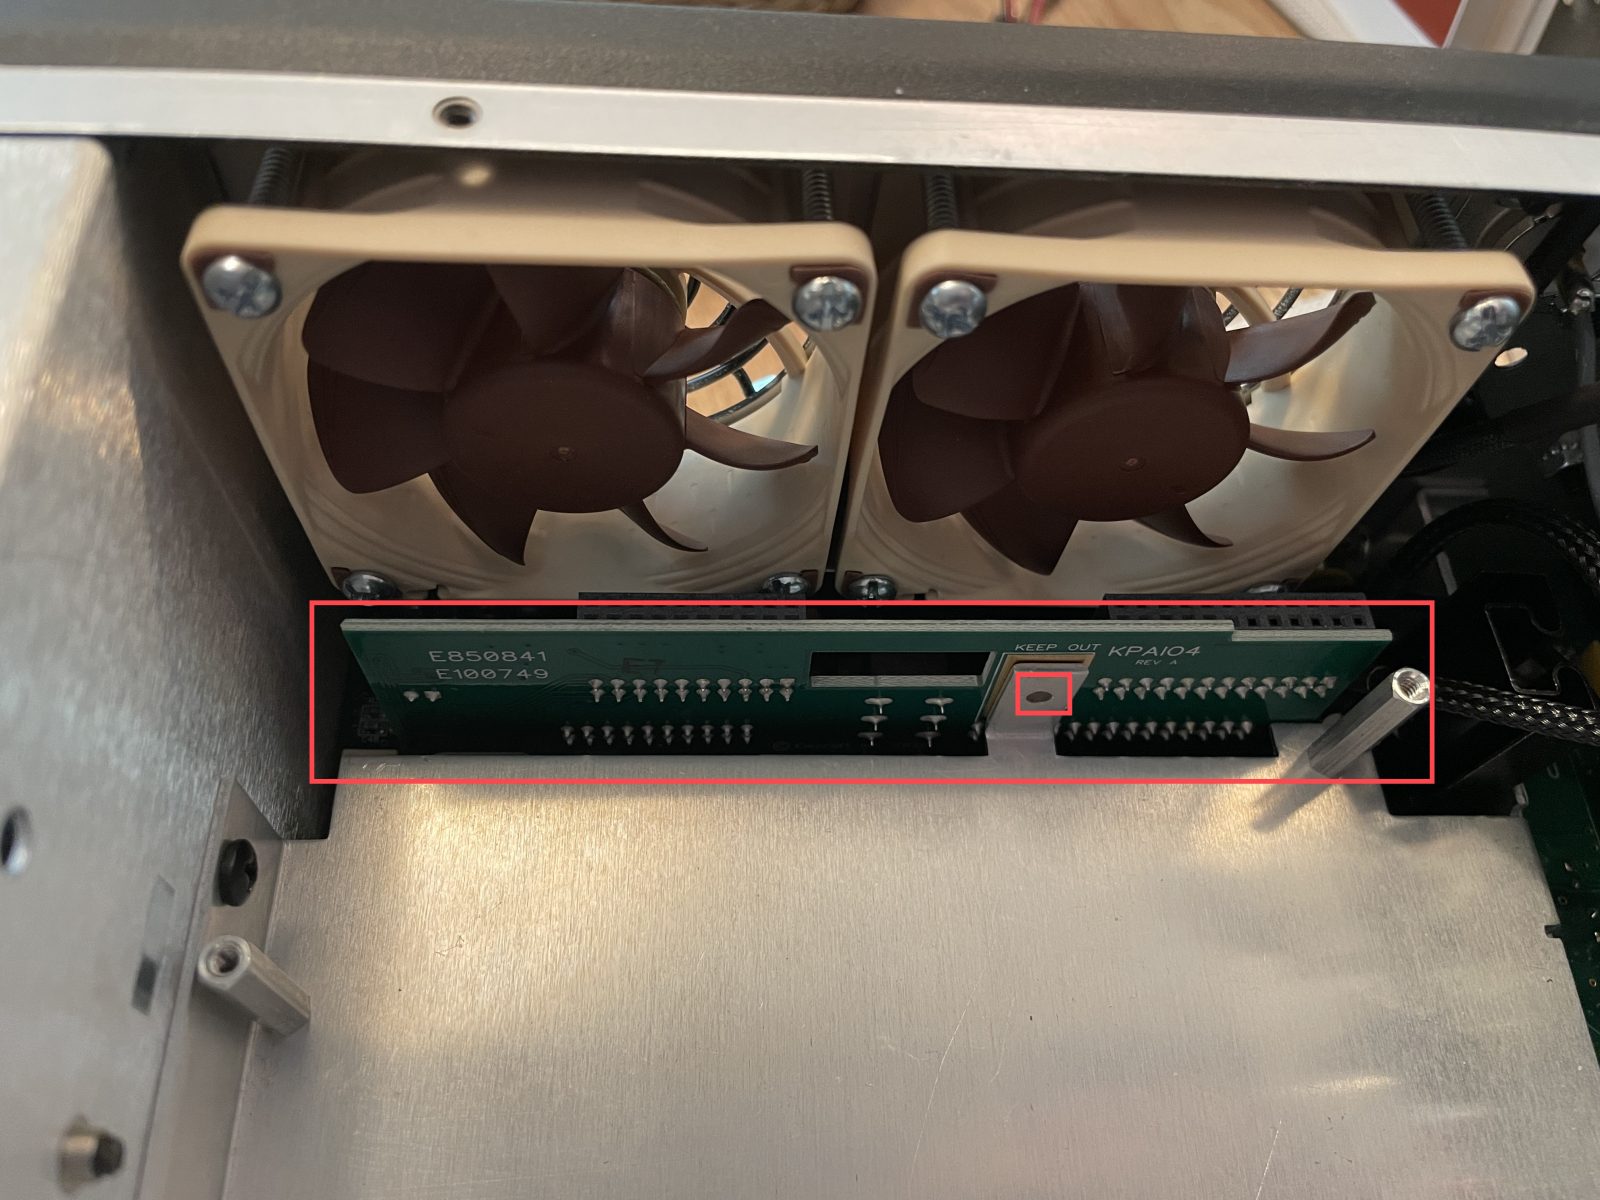
Next, remove the screw from the KPAIO4 – it’s the board that the KPA4 was plugged into. There will be a screw on the side (facing you) of the metal chassis. (See image below when I was reassembling.)
Remove the eight screws holding the current fans in. There are tiny washers on each side of the fan — try not to drop those!
On each Noctua fan, insert its 3-pin plug into the 3/4 pin to 2-pin adapter (see green box). Plug the adapter into where the fans were (red wire on right — see red box). With the extenders, the wires are really long. I routed them underneath the fan assembly and below the wire sticking out of the ATU.
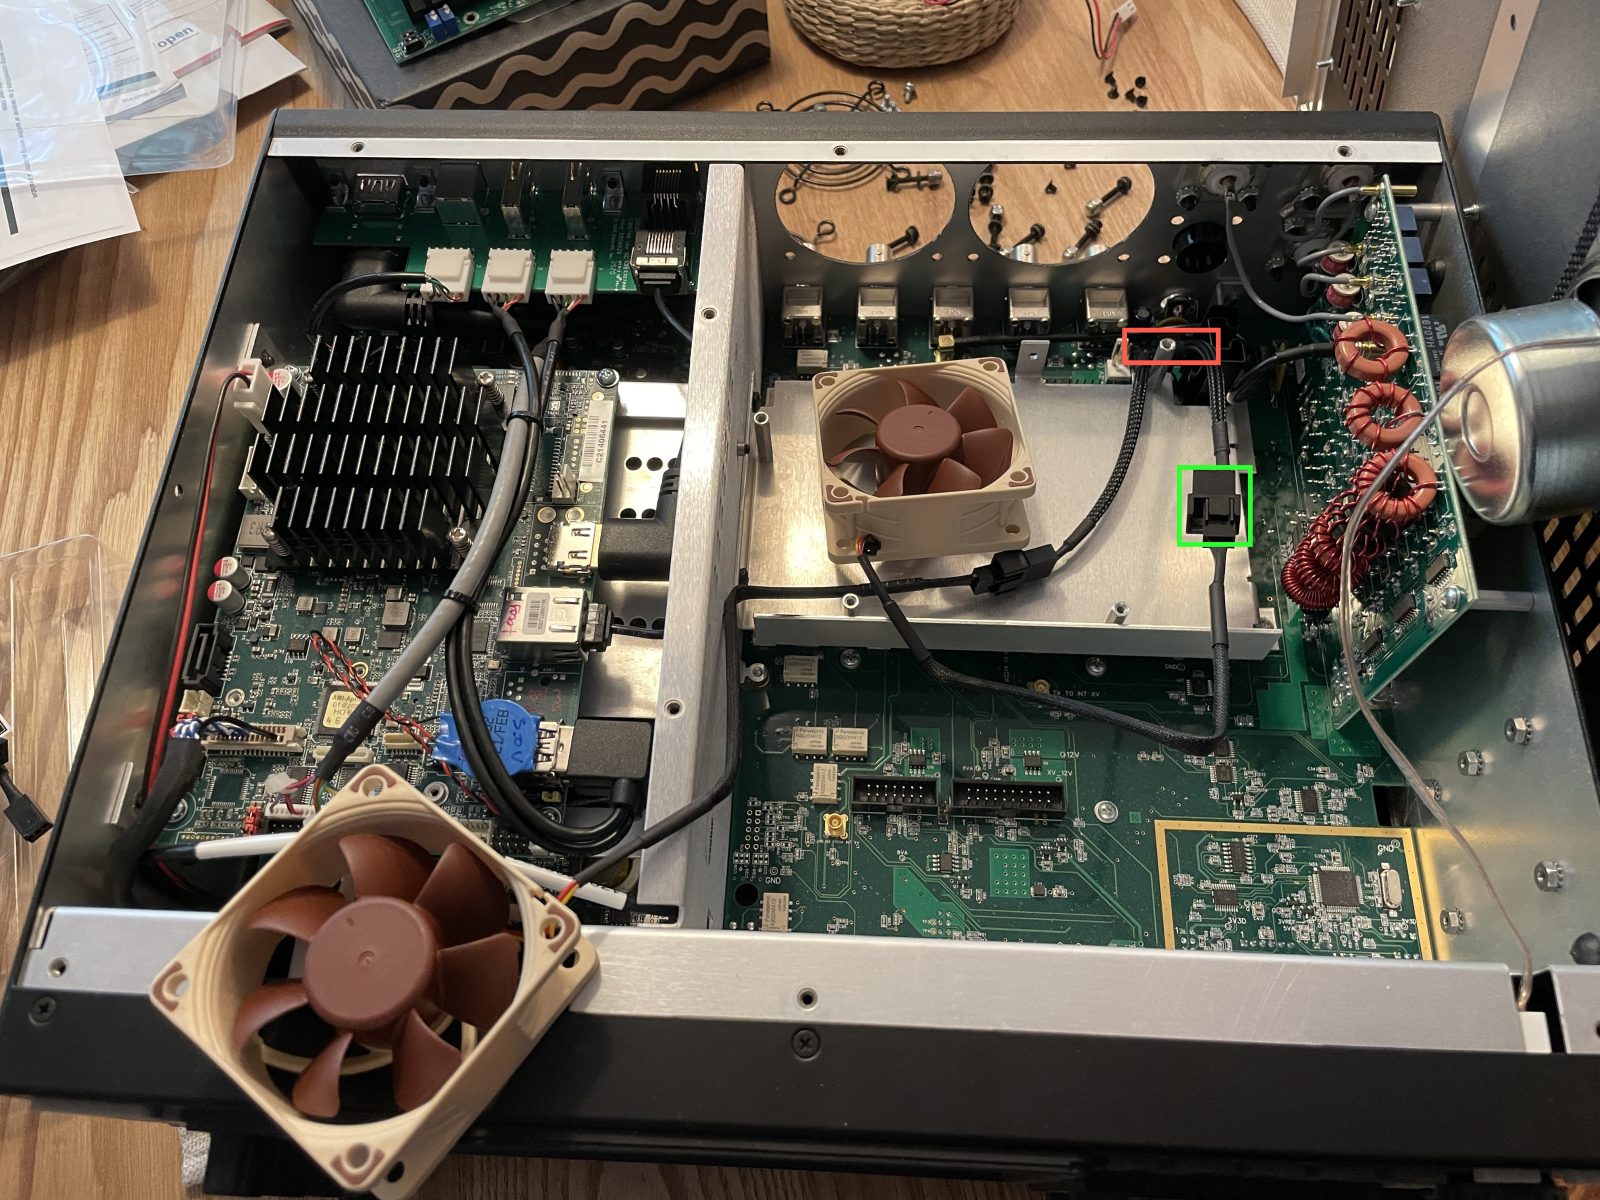
Screw each fan into the chassis using the 1 1/4″ machine screws. On the back, you’ll reuse the protective “cage” from the previous fans. The two on the bottom-middle will need to be very snug to accommodate the reassembly process.
Insert the KPAIO4 board back into its slots. This can be a little tricky because of space the new fans take up. Screw the side into the base plate as before.
Insert the KPA4 onto the KPAIO4 board and 5 screws into the base.
Plug in the speaker connector (if you disconnected it earlier).
Put the top on and add the ten screws.
Reconnect everything to the radio.
The sound seems to be about one speed-setting lower than the previous fans, and no whining noise.
Hi
Thanks for an interesting write-up. I will receive my K4 in two weeks and I am very excited to get it. A question – based on Elecraft and your pictures K4 ATU seems to be rather similar to K3 ATU. There is an obvious difference in the number of the ANT connectors, but in addition K4 ATU has a component U5 (a SO8 package) close to the bottom notch of the ATU PCB. Did you happen to make a note what is the type number of that part? If not – would it be possible for you to check it for me from your rig when you open it next time…
73, Jaakko, OH8NJ
Email: (redacted)
Has anybody checked what is the component?
Br, Jack