In mid-December 2022, N1MM (version 1.0.9758) introduced a spectrum display option supporting the Elecraft K4 radio. Below is a walk-through on setting it up.
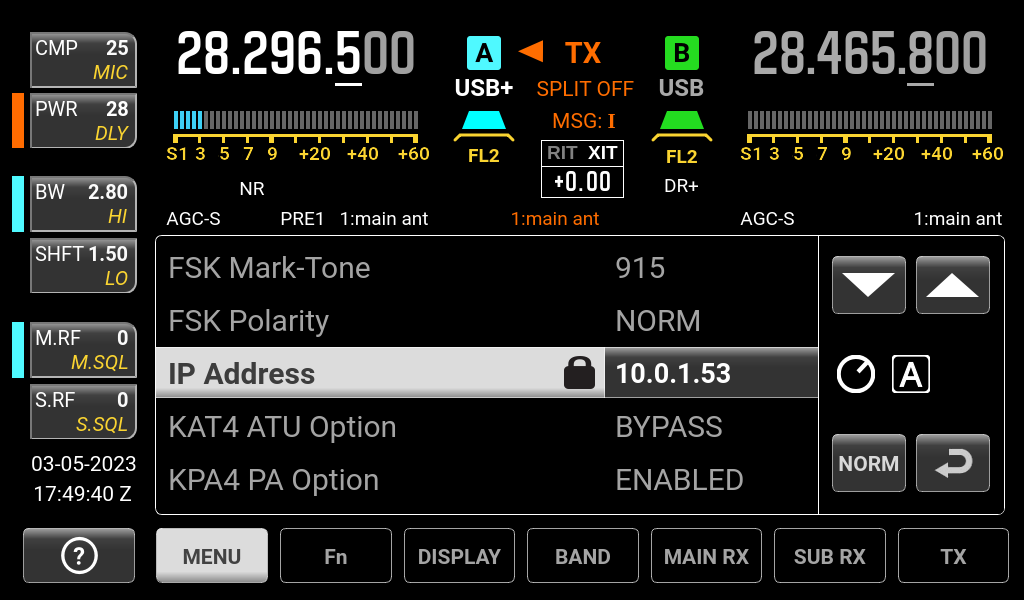
For this to work, your radio will need to be connected to your local network. You can check this by tapping the Menu option and scrolling to the middle. You should see a valid IP address like in the screenshot above.
If you use a firewall (e.g., Firewalla Gold), you will also need to allow communication between devices on the port 9200.
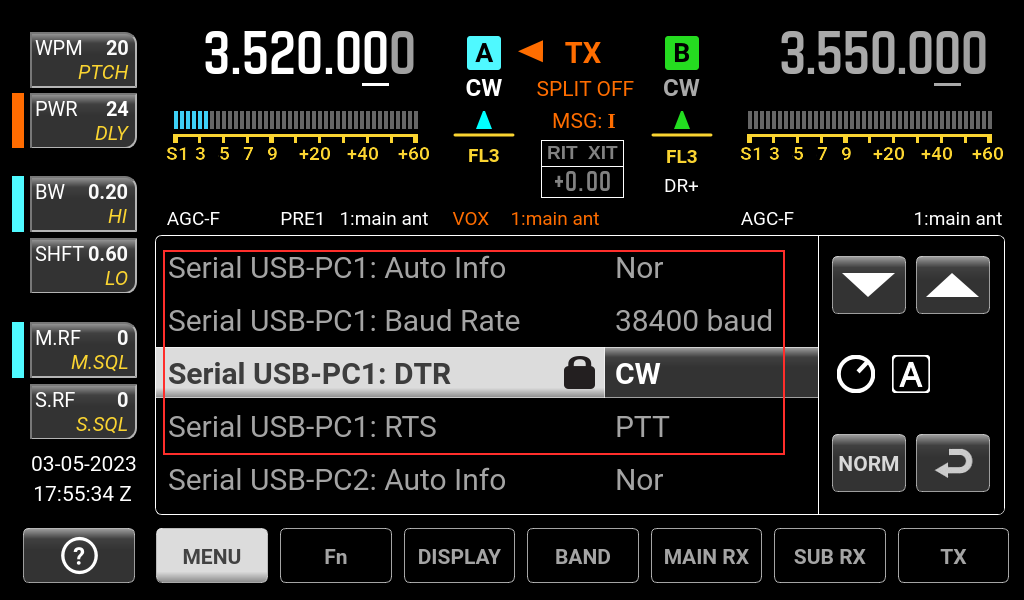
While you’re there, scroll down double-check the serial port settings. For CW, I have my first port (which happens to show up as COM12 in Windows) set as DTR=CW, RTS =PTT:
Now start N1MM. Select Config -> Configure Ports, Mode Control, Winkey, etc…

Click on the Hardware tab:
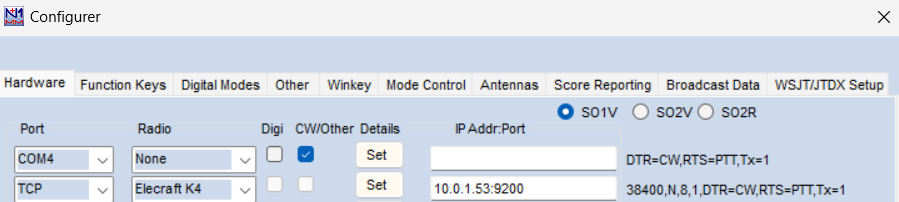
The “Port” (COM4) is set to None. The CW/Other box is ticked. In the options, DTR=CW, RTS=PTT. (NOTE: the port numbers will change if you plug the K4’s USB into a different socket. See here for how to determine it.)
On the next line, Port is “TCP” and the radio selected from the drop down. In the IP Addr:Port box to the right is its IP address and port (9200).
Note: In my home network, I’ve pre-assigned IP addresses in my firewall so I can track their behavior. For most people, the IP address is randomly-assigned and can change. When it does change, you’ll need to updated it here. To avoid that, you can also use your radio’s host name, which will be of the form K4-SNxxxxx.local, where xxxxx is the serial number. The port will be unchanged. (For example: K4-SN01234.local:9200)
Now You Know!
Okay once that’s set, try clicking on the frequency bar. The radio should change bands. You can optionally send a test transmission to verify the CW part is working fine.
In N1MM, open up the spectrum window (Windows -> Spectrum Display).

Right click on the middle part to pop up this configuration menu.

Select Spectrum Source -> For All Other Radios –> Radio 1 Pan A. If you don’t see Radio 1 Pan A listed, you may need to reboot your PC. (I noticed mine had the port busy despite what N1MM was showing). When you restart, Launch N1MM.
If it’s not automatically doing so, connect to a spotting service. Select Window -> Telnet.
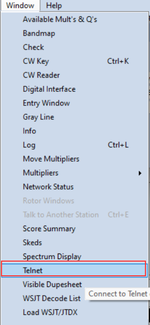
In this dialog, click on “Clusters” and select your favorite. (Or choose one.)
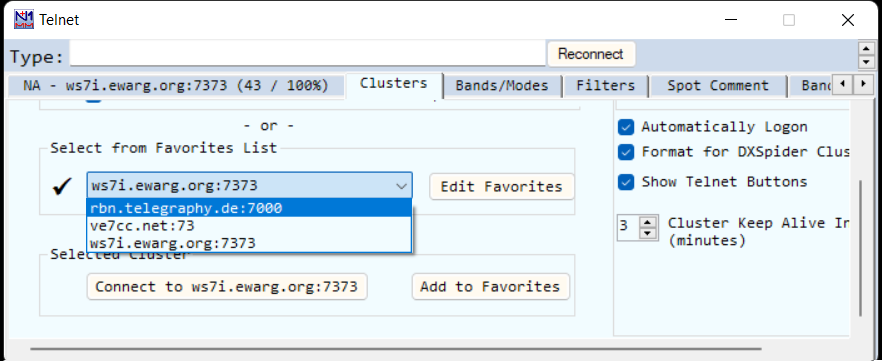
If it’s a busy weekend, you should see it start to populate. I had to play with the window to get the view below (I dragged the rightmost side over, then in the blue spectrum selected “Permanently delete this window”, then reopened and it looked more like this with a smaller waterfall:

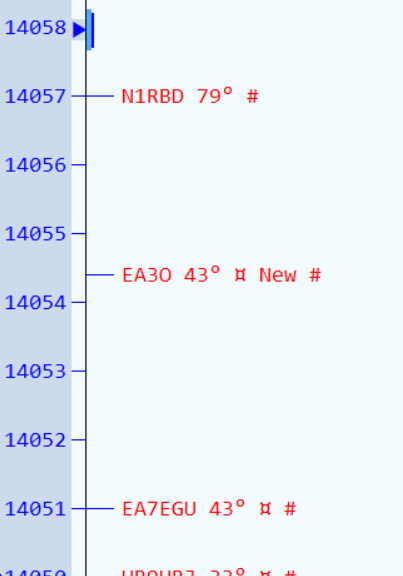
As with the normal N1MM display, you can click on a call sign and it will auto-tune. Red are new and potential multipliers for the event (ARRL SSB DX shown). If I click on VP5M, it tunes close-ish to that user:
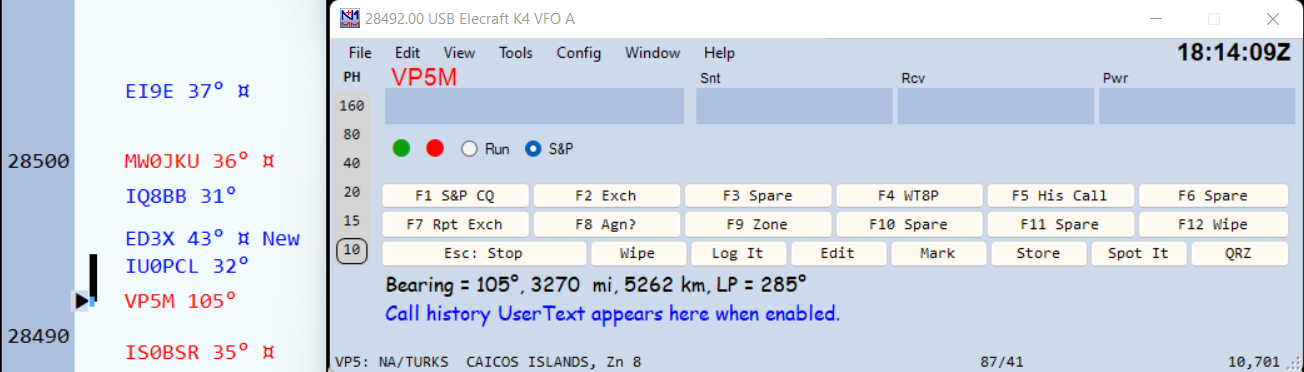
Radio screen here:
While I can hear him, he is unable to hear me. Bummer. (Update to self: Durrrr, take it out of test mode, dumbass.)
As I’m typing this, I notice that I have four views of the spectrum:
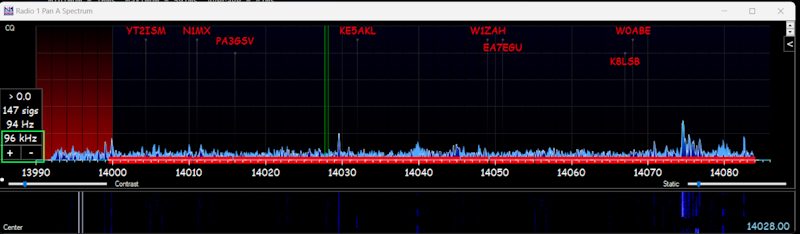
- N1MM Spectrum Display, It can be set to a maximum bandwidth of ~384kHz (see first photo, above) to see if anything is going on in the band. For lower bands, tick the +/- to adjust. In the image above, it’s set to 96kHz. If you right click on a frequency, then control-Right click, it will automatically select Split Mode, with A receive, B the transmit frequency. This would be most useful zoomed in.
- N1MM VFO display. For a SSB event, I have it set to about 80kHz wide to provide some separation between calls. For CW, I would have it further reduced, depending on how many spots are being shown.

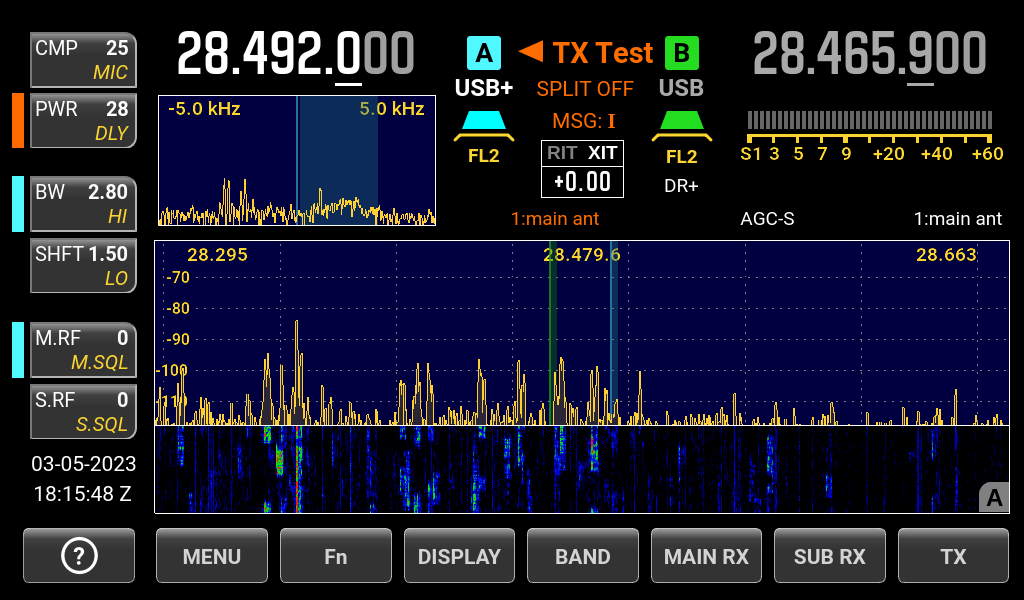
- K4 Spectrum and waterfall.
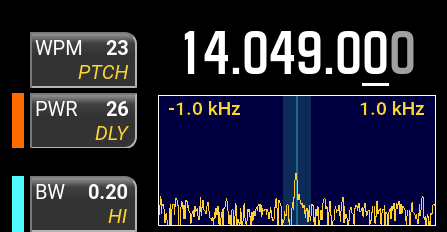
- K4 Mini-VFO spectrum, 10kHz (SSB) or 1kHz (CW) – this is great for trying to get right onto the caller frequency. When I’m working S&P on a CW event, I will get close enough, send my call and, while they call me back, zero-beat them (so they’re more audible).