With my KX3, using N1MM+ to manage CW sending was accomplished via an indirect set of KX3 macros and keyboard sequences. Thus, we had this awfulness:
F1 CQ,{CATA1ASC KY CQ SST * ;}
F2 Exch,{CATA1ASC KY TU {EXCH};}
F3 Tu,{CATA1ASC KY tu * ;}
Bob (N6TV) presented at the Spokane DX Association and mentioned this on slides 52, 62, and 63 of his presentation. There is a lot of good information in his presentation, and you should view it. For my notes to self, the configuration is thus:
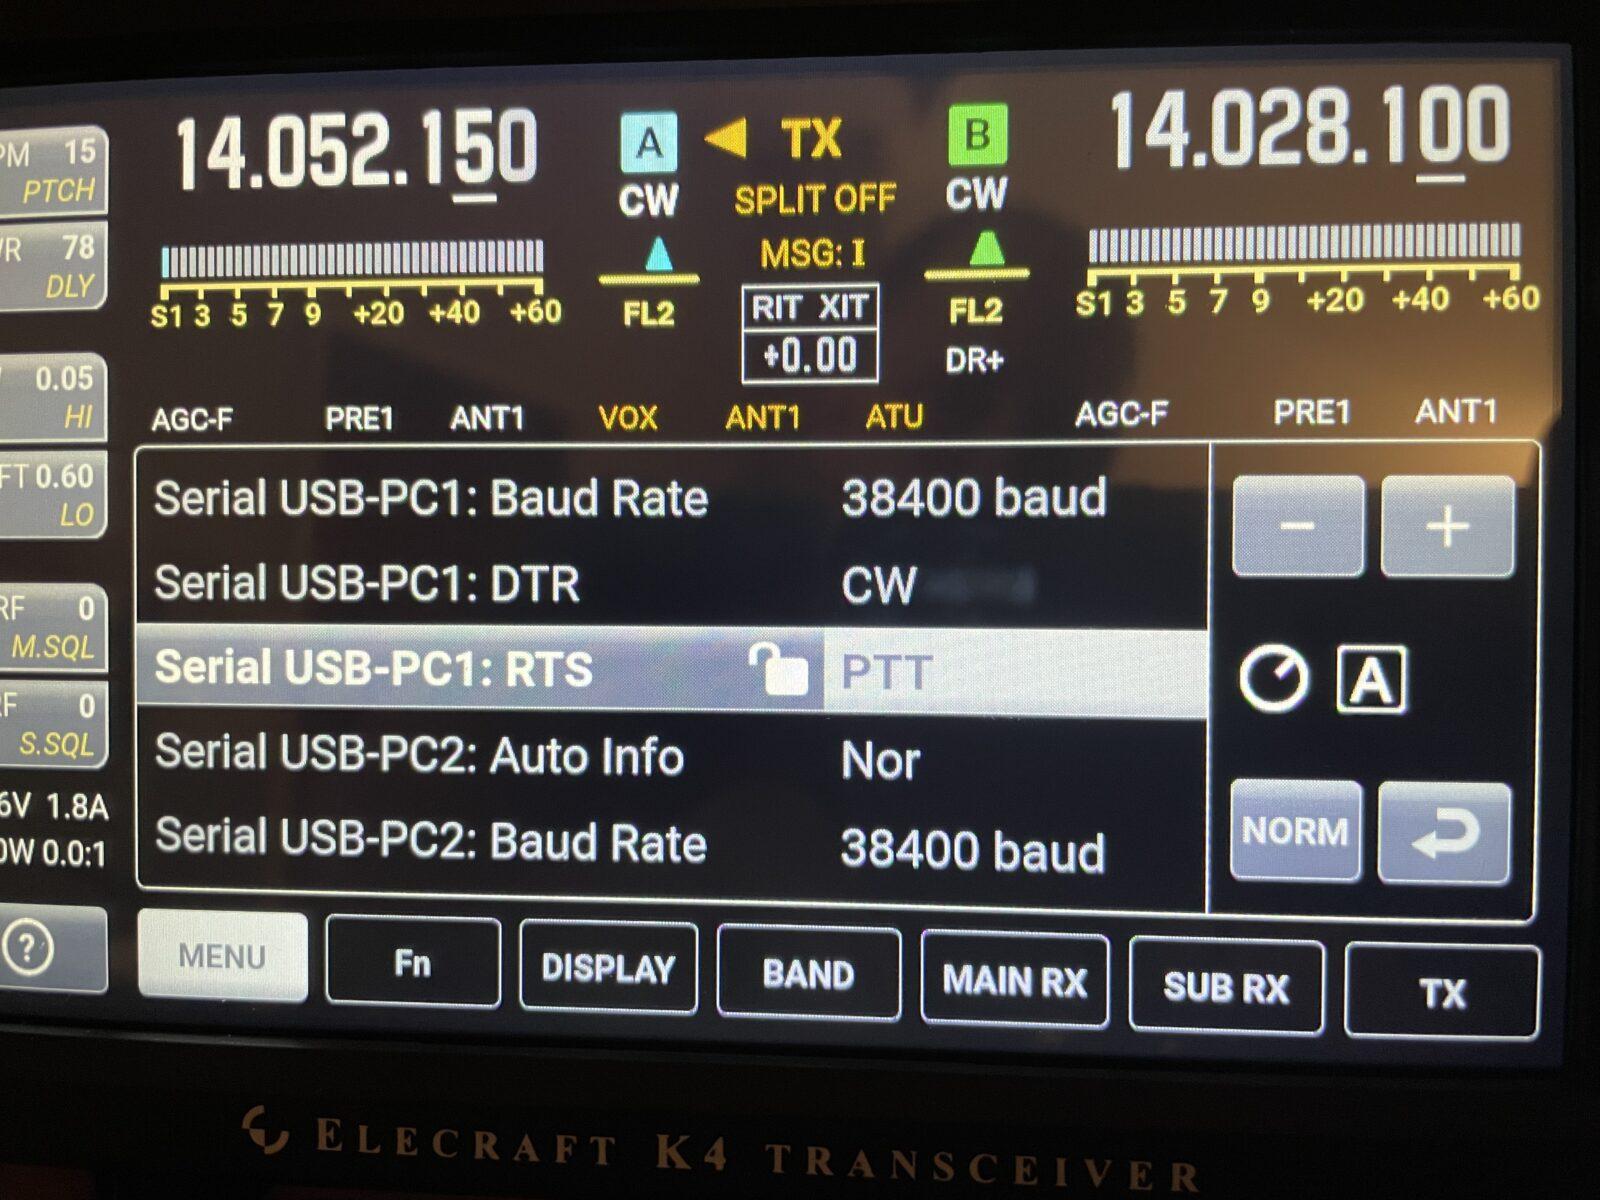
On the radio, tap “Menu” and scroll down. There are two settings of interest:
- Serial USB-PC1: RTS = PTT
- Serial USB-PC1: RCS = CW
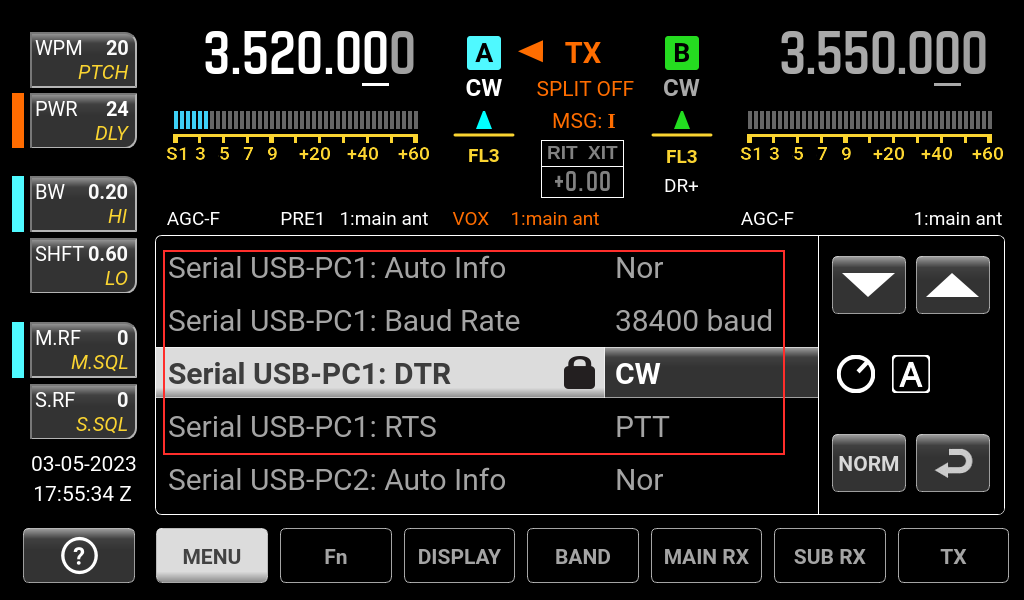
Tap the lock icon to unlock, then turn the knob until the requisite value is selected. The result should look like this
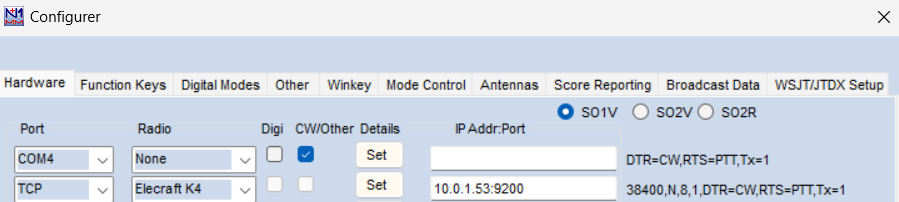
In N1MM+’s Configurer, select Hardware. Use the first serial port we identified last time (e.g., if you have COM6 and COM7, use COM6):

For radio, select “None” Now click on the Set button underneath the details:
- Change DTR (pin 4) to CW
- Change RTS (pin 7) to PTT
- Ensure the tickboxes on the bottom right are deselected
- Bob recommends setting PTT delay to 15, which is half of the default.
If you want to use the N1MM spectrum, add a second line:
- Port = TCP
- Radio = “Elecraft K4”
- For the IP address, use the value in your radio (or its host name) with the port :9200
And that’s it! You can use the standard N1MM+ key files out of the box.
F1 CQ,CQ SST *
F2 Exch, TU ! {EXCH}
F3 Tu, TU
F4 MyCall, *
F5 His Call, !
F6 WA, WA
F7 TU NAME,TU {NAMEANDSPACE} 73 *
F8 ?, ?
F9 Nr?,nr?
F10 WT8P slow; W~T~8~P
F11 SPOT,{CATA1ASC SP3;}
F12 ee,ee