After a year, my new Elecraft K4D has arrived. To any new owner, I’d highly recommend grabbing Bob (N6TV’s) general setup checklist. There are also some great presentations on Bob’s QRZ page.
There were a lot of steps necessary to set it up with WSJTX’s FT8 that I thought would be worth expanding here with a lot of screenshots. This uses Windows 11. Please let me know how this works for you and if any adjustments are needed for earlier versions of Windows. (I have already included a screenshot of the Windows 10 sound option.) [August 2022: Many of the problems people have are because they’ve missed steps. Common gotchas include: WSJTX changing sound cards, not setting the volume levels or using CAT instead of RTS.]
Updates:
- 2023-07-21 Added comments from Joe, W8JH, regarding volume settings.
- 2023-05-19 Added screenshot of using the hostname for CAT control.
- 2023-05-11 Updated screen to show “Fake It”; updated some screenshots
- 2023-02-02 Clarified test PTT while Test CAT button is green. Thanks Dave, N3RD
- 2022-07-18 added RTS method (vs CAT) for PTT
- 2022-03-16 with Windows 10 screenshot for renaming audio devices, thanks Dennis K6DD
- 2022-03-15 with correction for setting Line IN, thanks Ben KE3KQ;
This is broken into two sections:
Windows aspects:
- Identify serial ports
- Adjust advanced properties of the ports themselves
- Friendly name
- Volume level
WSJTX:
- Rig configuration
- Sound card configuration
- Volume level
Windows Aspects
Identify Serial Ports
When you first plug the USB cable in, Windows will assign the K4’s two virtual serial devices to a COM port. Unfortunately, the port numbers will change depending on the physical socket, and most programs’ use that number. This will provide some guidance at how to identify that number.
Ideally, before you plug the K4’s USB cable in, start the device manager. Tap the Windows key, and start typing “device” – you should see this pop up:

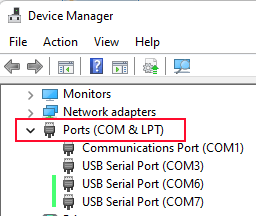
Click the icon and you’ll see an exhaustive list of logical devices that Windows lists. For now, scroll down to the “Ports (COM & LPT)” section. Click on the > to expand the list. You should see something a list of devices.
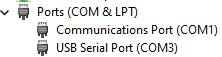
Now, plug in the K4 USB cable. There will be some weird blinking of this application, and you should see two new devices pop up. In the example below, COM6 and COM7 are the K4 virtual USB devices:
If you jumped the gun and plugged the cable in before running device manager, remove the cable, wait a few seconds, note the setting, then insert it again and note which devices show up.
Adjust properties on the devices
Bob (https://www.qrz.com/db/N6TV) has a lot of great information on USB ports that is beyond the scope of this tutorial, and you should read his presentation. For this tutorial, we’re going to adjust two windows defaults.
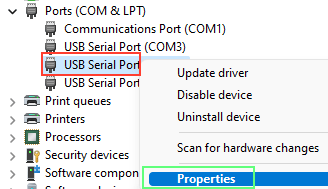
Select the first device (in the example above, COM6, then right click and select Properties:
In the menu, you will see the Manufacturer shown as FTDI and the location “on USB Serial Converter A”:
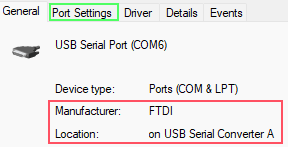
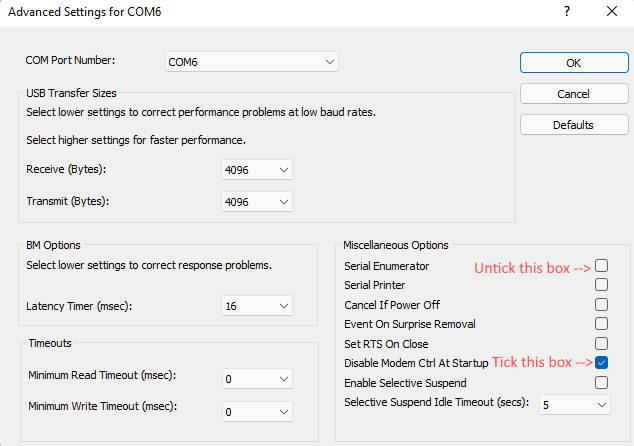
At the top of this dialog is “Port Settings” – click on that tab. In the Port Settings dialog, click on Advanced…
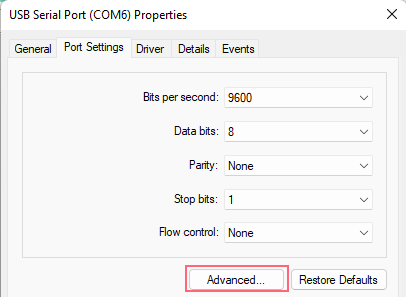
- Untick “Serial Enumerator”
- Tick “Disable Modem Ctrl At Startup”
When done, the dialog will look like this:
Friendly Name
The K4 gives you two input and two output devices. Unfortunately, Windows 11/10 will generate a generic name like “x – USB AUDIO CODEC” where “x” is a number. For FT8 purposes, I find it helpful to assign a more meaningful name.
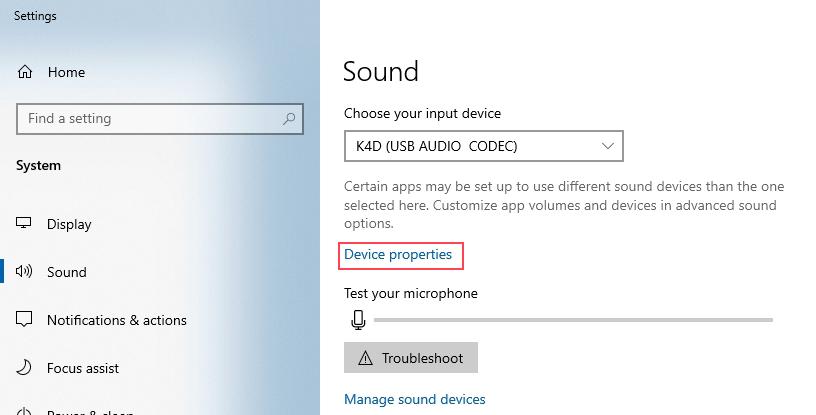
On Windows 10, run the sound application. Choose your input device and then click on Device Properties. (There is a tutorial here.) Repeat for the output device.
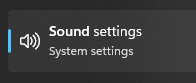
On Windows 11: run the Sound Settings application (Tap windows key and start typing “Sound settings’):
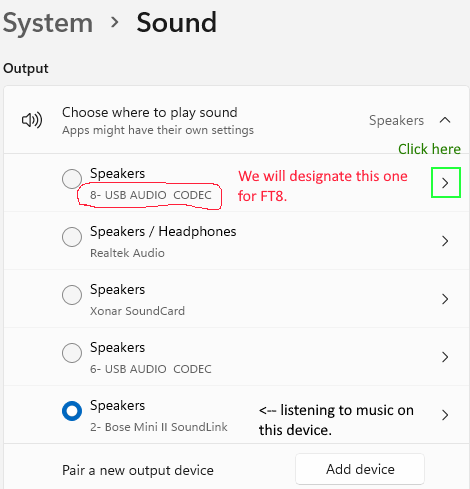
In the top half of the screen is the output devices. Pick one of the “USB AUDIO CODEC” and select the green arrow on the right. (What you don’t want to do is select the radio button as this will designate all sound going to that.)
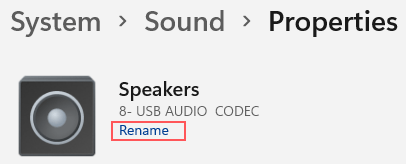
In its properties, click rename underneath the name:
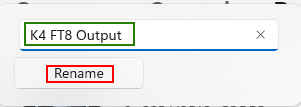
This opens up a hovering dialog. In it, I named my device “K4 FT8 Output” then click the “Rename” box. A little checkbox will appear. Click elsewhere on the dialog.
If successful, you should see the name changed in the green box:
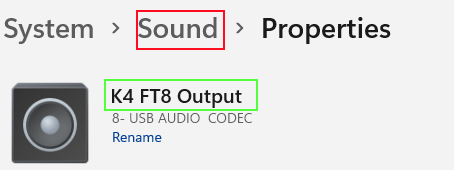
If not, try again. The control is very different from most of the ones in Windows (more like a modern phone setting).
Next, we will set the input device. Click “Sound” to go back to the previous menu. Scroll down to the Input block. Select the > next to the device of the same name as above, e.g., 8- USB AUDIO CODEC:
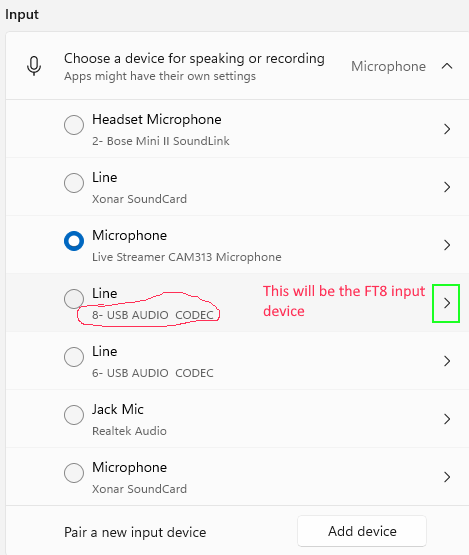
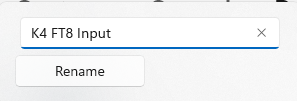
For consistency, rename this one “K4 FT8 Input”, tap rename.
Volume Level
While we’re still in the Properties dialog for dialog, look at Input Settings section, specifically the Input Volume section. It defaults to 100%. I found it necessary to reduce this a lot so it doesn’t overpower the FT8 input. Change it from 100% to 15% (we may need to adjust it later):
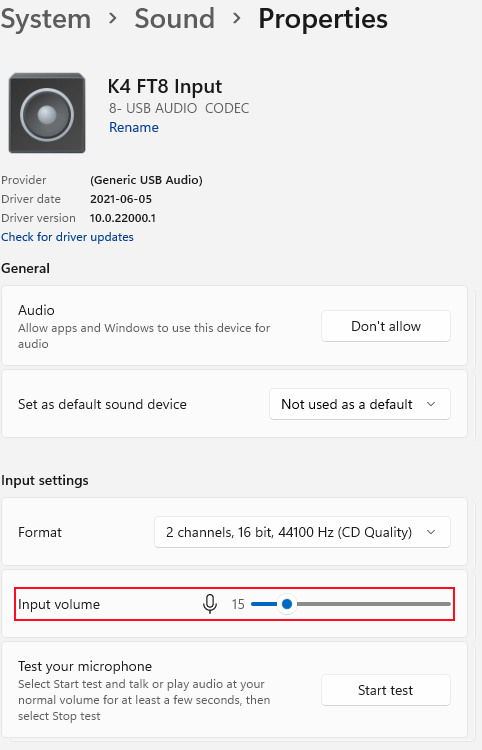
2023-07-21 Note: Joe (W8JH) reports needing to set his to 100%. You can determine the optimal level by looking at the FT8 monitor display on the bottom left. As long as the gauge reads in the green, you’re okay. If it’s red, it’s too high or too low.
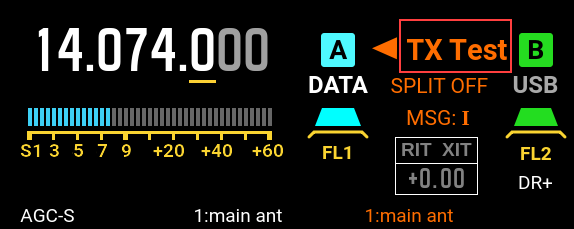
Before we do the last bit of configuration, please put your K4 in test transmit mode:
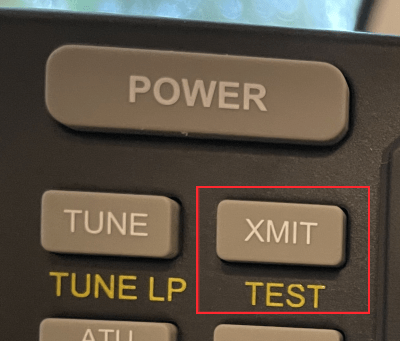
This is done so we don’t inadvertently transmit while setting up WSJT-X. On the screen, you should see TX Test
WSJTX
Start WSJT-X. It will most likely complain about the radio configuration – click OK to go to the settings dialog. Click on the “Radio” tab. Settings are similar to those mentioned in item #15 of Bob’s tutorial. See below for the alternate approach using a TCP connection.
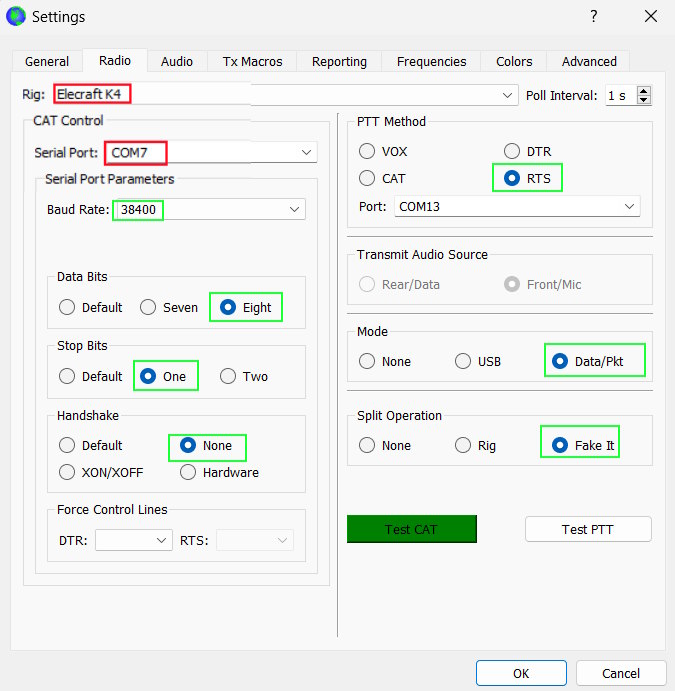
Under Rig, select “Elecraft K4″
Serial port will be one of the two we discovered earlier. (In my example, COM6 and COM7.) I chose COM7 for this.
The parameters in green boxes should be set:
- Baud rate: 38400
- Data bits: eight
- Stop bits: one
- Handshake: None
- PTT Method: RTS (For serial port usage, 2022-07-15 Bob N6TV recommends this vs CAT because some users have reported their machines sending TX twice)
- Mode: Data/Pkt
- Split Operation: Fake It
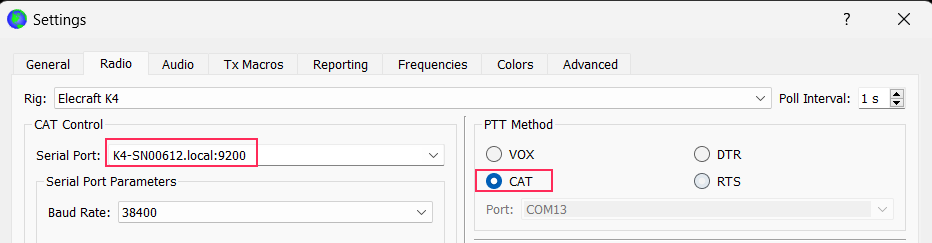
Alternatively, if you are using WSJTX 2.6 or later, you can also use TCP/IP instead of a serial port. (Doing so will free up serial ports for other uses.) Either the IP address (e.g., 10.0.1.53) or the hostname (e.g., K4-SN00612.local, where “00612” is changed to your serial number) with the default port (9200). Change PTT method to CAT:
Now click the Test CAT button. If the settings are correct, this will turn green (like above). The K4 may also click as it changes frequencies to whatever you had set recently.
Next, and while the TEST CAT button is green, click Test PTT and you should see its button turn red. Because we put the radio in test mode, it will react as if it’s transmitting, but the radio won’t actually transmit:
Click Test PTT again and it should go to gray (and not simulate transmit).
In the Settings dialog, click on Audio and select the input and output devices based on the names we set up earlier:
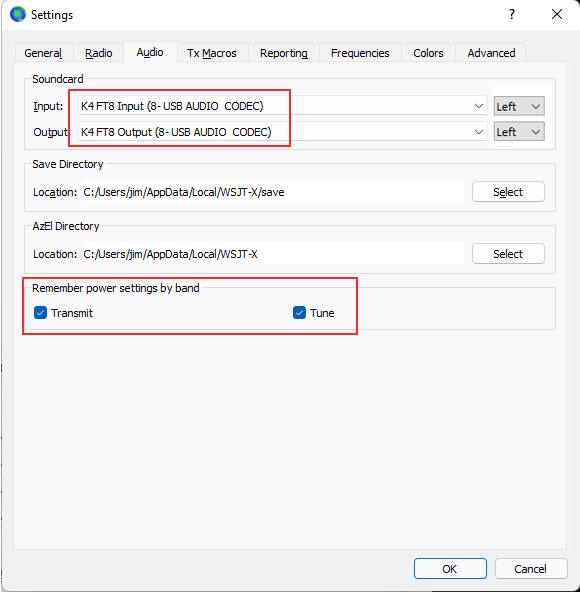
While you’re here, tick the two boxes for remembering power settings by band.
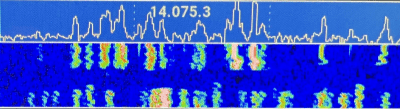
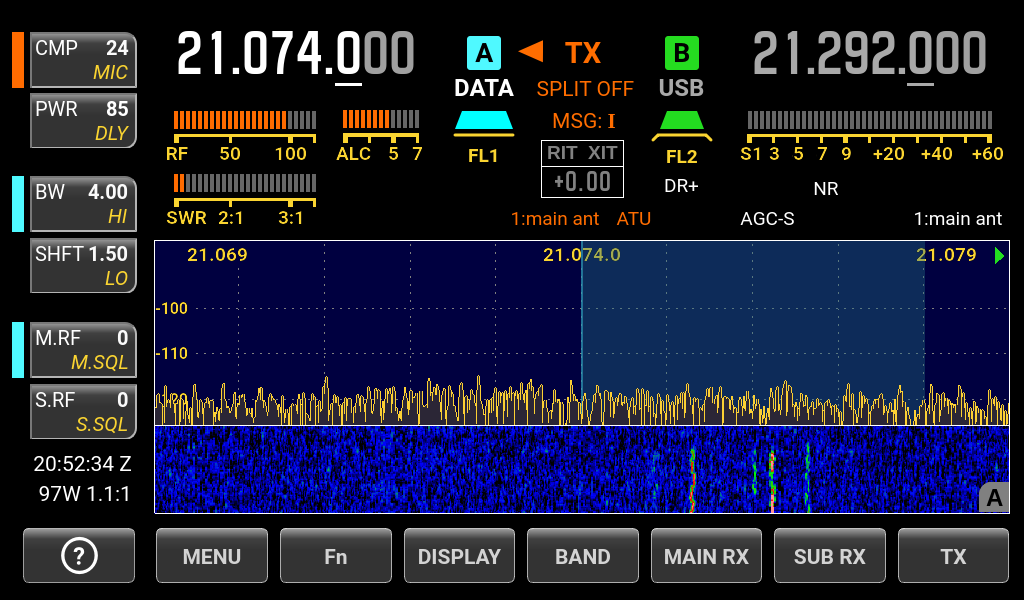
If you choose FT8 mode and pick a band (20m daytime, 40m nighttime), you should start seeing signals received on the panadapter:
Two last steps
On my radio, it was necessary to adjust the sound level to drive the transmitter. Press: TX -> Line IN Select Sound Card. Now, adjust the level from to about 32. (This is just based on two radios, yours may need to be different. 2023-07-21: Joe, W8JH, reported needing to set his to 230 to get 4 bars of ALC.)
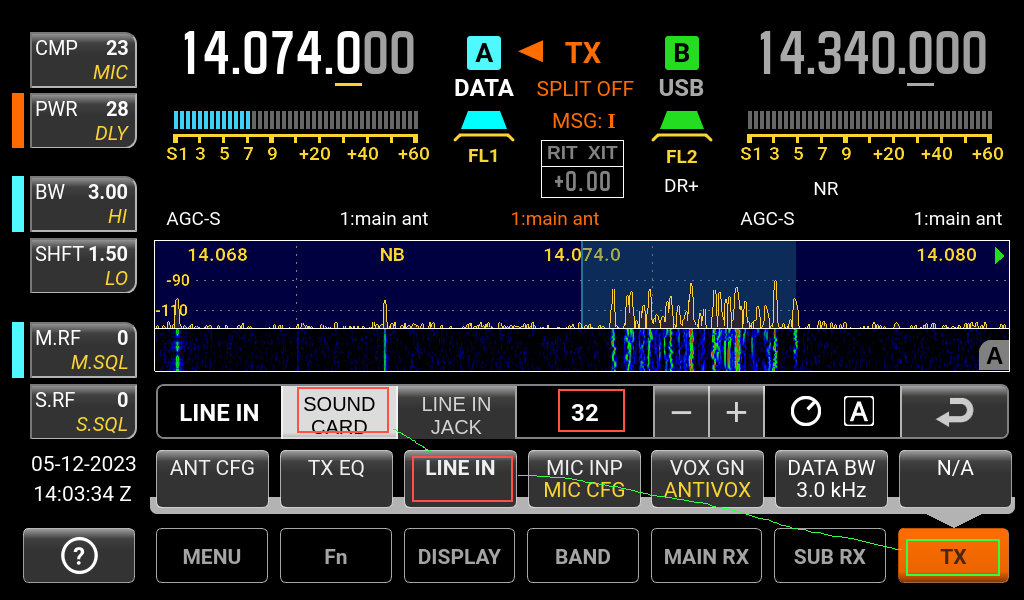
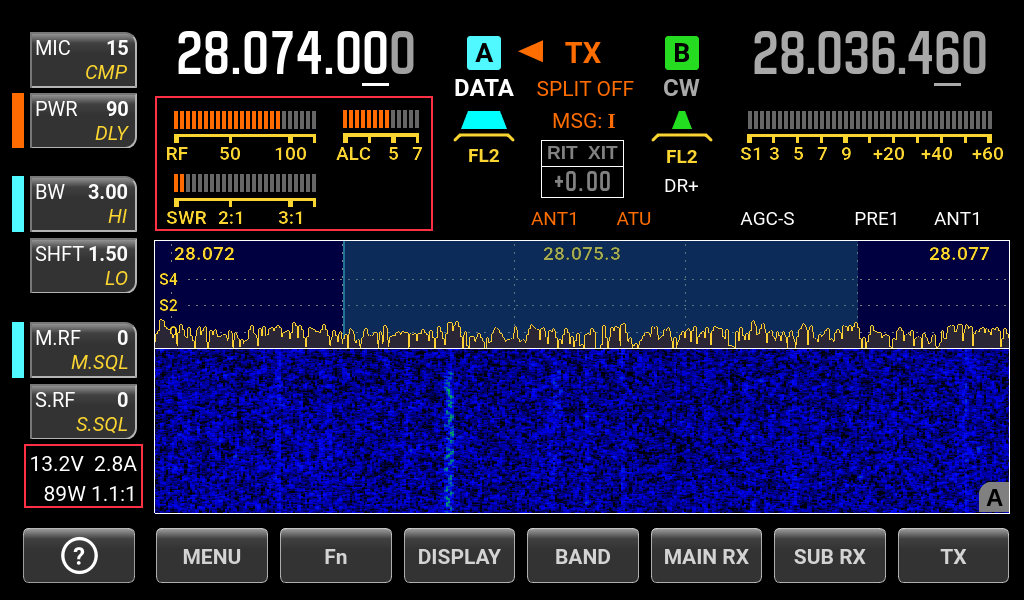
What you’re aiming for is an ALC level in the 4-5 range to drive output:
At this point, you should be ready to go on the air and test for real. Press and hold the XMIT button to turn off test transmit mode.
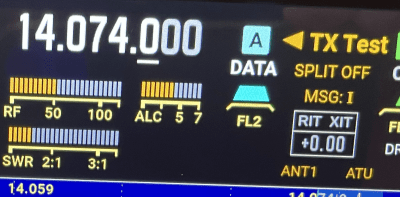
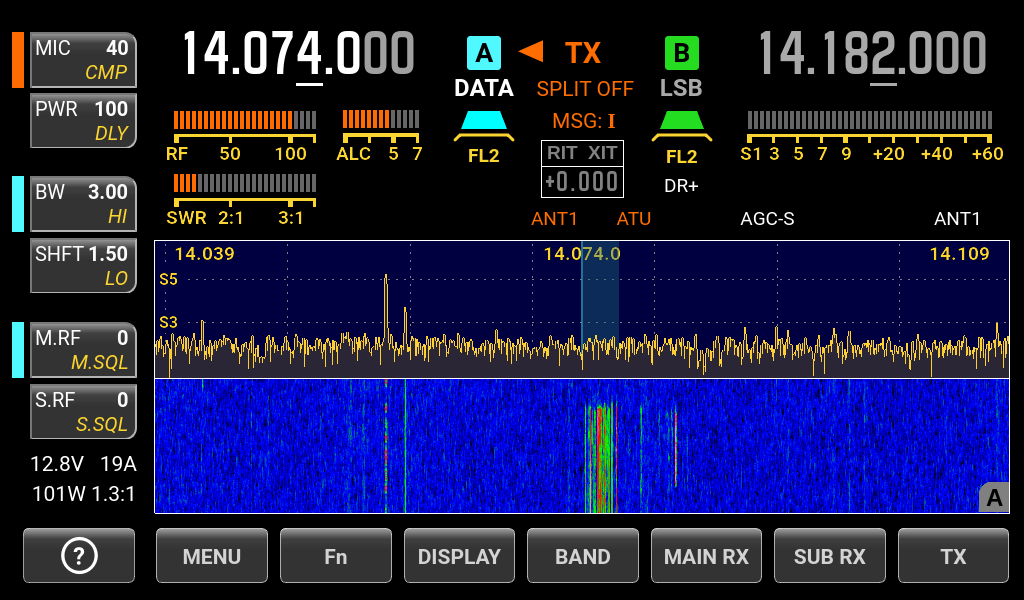
[2022-03-06 update at the request of Ben KE3KQ to add a screenshot of the K4 transmitting screen] Since my antenna is new to the radio (and vice versa), I spent some time going through each band on the FT8 frequencies and hitting tune. Now that’s done, we’ll test it. 10M this afternoon is pretty busy, so I first tried Curacao (no luck), then Argentina.
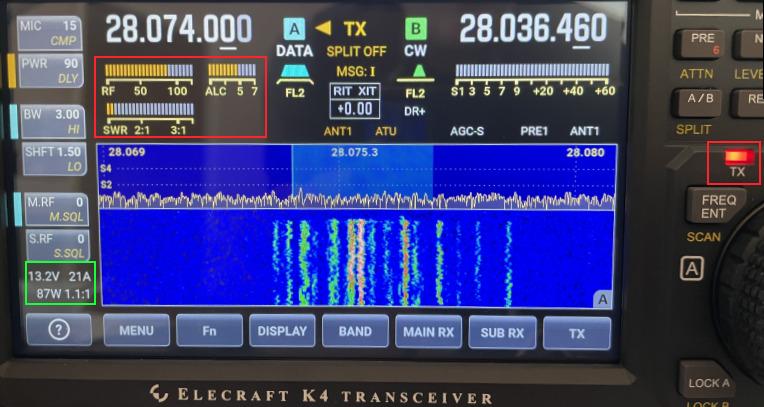
Here we can see the radio transmitting (far right). I’m using 90W to start, ALC is at an acceptable level and, thanks to the tuner, the antenna looks fine to the radio. On the bottom left, we see we’re drawing about 21 amps.
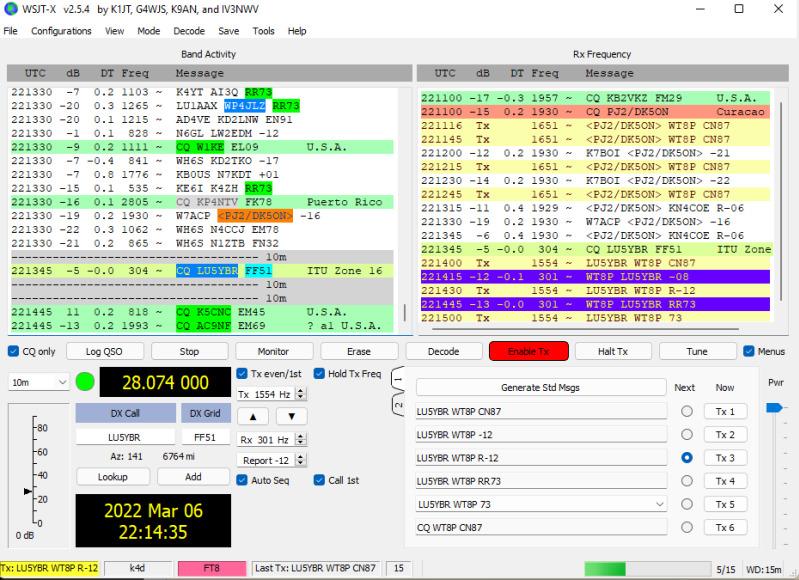
And below, WSJTX shows a successful exchange between Seattle and Argentina. My signal was strong enough that I could have probably dialed it back to 50W
Next, we’ll get N1MM+ set up properly so we can have some fun on CW.
Hi and thanks for this comprehensive instruction which I found through the link in the K4 IOgroup.
I still run a PC with Windows 7 Professional on FT8 and an IC-7300. Haven’t yet had time to switch to
my K4D (S/N 0561). Will the Windows instructions be much different for Windows 7?
73
Rainer SM5LBR
One thing that will be different is renaming the sound devices. The device manager settings should be nearly identical.
73, Jim WT8P
I don’t get the options for selecting output to transmitter you get. The only thing that works at all is setting my microphone close to the speaker